
Use adhesive silicone cord wrappers. Simply stick them to the back of your appliance, wind the excess cord around them, and secure the plug end into the center slot for a clean, tight fit.
2. Can I use binder clips for cord management?
Yes, they are an excellent temporary DIY fix. Clip the binder to the edge of a desk or counter, remove the silver handles, and thread your power cable through the loop to keep it from slipping behind furniture.
3. How do I prevent cord tangles?
Always group cords by length and use velcro cable ties to bundle them together. Keeping individual cords bundled close to the base of the appliance prevents them from sprawling across the counter.
4. Is it safe to fold appliance cords tightly?
Never fold cords at a sharp 90-degree angle. Always use a loose, circular coil to avoid internal wire breakage. Over-tightening or kinking can cause short circuits and poses a genuine fire hazard over time.
If you look at your kitchen counter and see a tangled web of power cords, you aren’t alone. It is easy to let the “cord spaghetti” take over, especially when you have a coffee maker, a toaster, a blender, and a stand mixer all competing for limited outlet space. Beyond just looking messy, those trailing wires are dust magnets that make wiping down your counters a constant, frustrating chore.
Taming this mess doesn’t require a total kitchen renovation or expensive custom cabinetry. With a few simple tools and some basic planning, you can get those cords out of sight and off your workspace. Let’s look at how to stop the chaos and reclaim your kitchen counters for actual meal prep. This guide will walk you through everything from free DIY hacks to permanent professional solutions, helping you achieve a kitchen that looks as good as it functions.
Why Appliance Cords Are a Major Countertop Pain Point
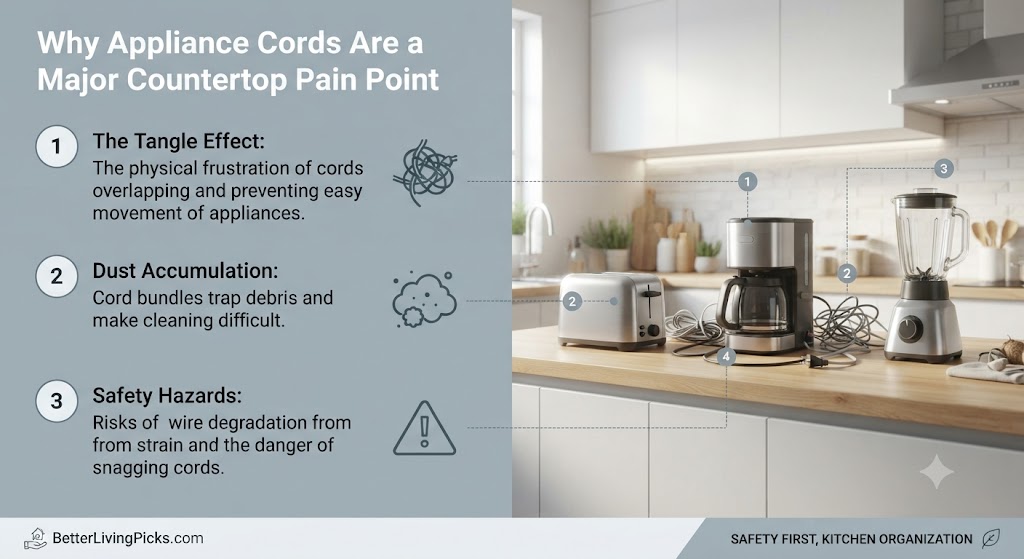
The “Tangle Effect” and Dust Accumulation
When you have multiple appliances plugged into the same area, the cables inevitably overlap. This creates a “tangle effect” where you cannot move one toaster without dragging the coffee maker along with it. This physical linkage makes it difficult to rearrange items, and it often leads to accidental spills if a cord gets snagged.
Worse, these messy bundles become massive dust traps. Flour, oil droplets, and cooking debris get caught in the loops of your cords. Over time, the area behind your appliances becomes a hidden layer of grime that you eventually have to deep-clean. Trying to clean this area without disconnecting everything is an exercise in frustration that most of us eventually stop doing, allowing the mess to build up even further.
Safety Hazards and Damaged Cables
Messy cords aren’t just an eyesore; they are a legitimate risk. If a cord is constantly bent or strained by being pulled taut to reach an outlet, the internal wiring can degrade. This degradation is often invisible, hiding inside the protective rubber sheath until the device suddenly stops working or, in the worst cases, starts to spark or overheat.
Additionally, loose, dangling cords are prime targets for getting snagged by someone walking past the counter. If a dangling cord is caught by a sleeve or a passing hand, a heavy appliance, like a stand mixer or a food processor, could be pulled off the counter. Keeping them managed protects your expensive equipment and keeps your workspace safe from those accidental tugs that can ruin a perfectly good cooking session.
Simple DIY Fixes Using Household Items
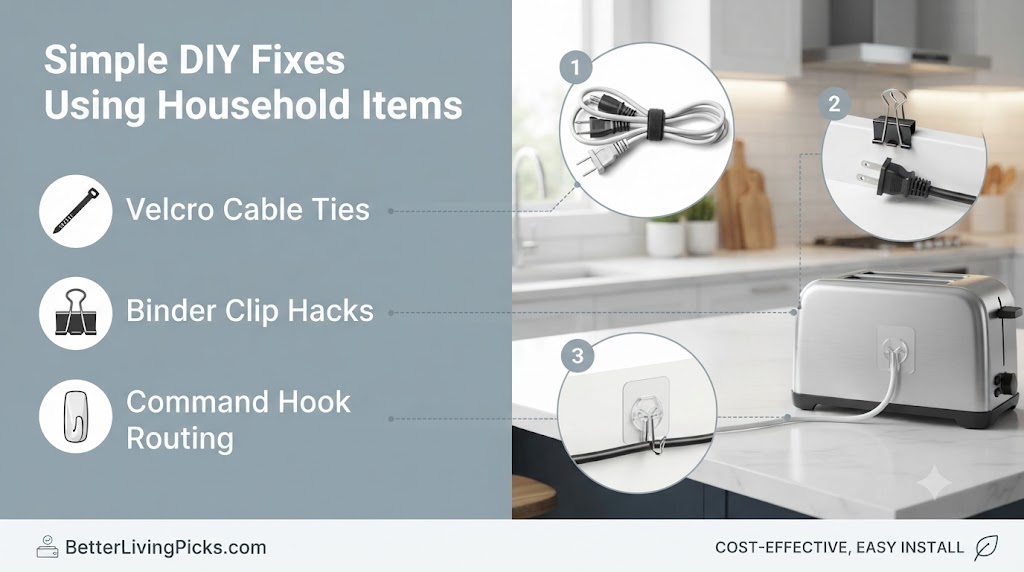
Velcro Cable Ties for Rapid Deployment
Velcro ties are the gold standard for quick, adjustable organization. Unlike plastic zip ties, they are reusable and don’t require cutting, which makes them perfect for kitchen gadgets you might move occasionally. Simply gather the slack of your power cord into a circle and wrap the Velcro tie around it. It keeps the cord neat, and you can undo it in a second if you need a little more length for a specific cooking task.
Keep a handful of these in your “junk drawer.” They cost pennies, yet they are one of the most effective ways to manage different cable thicknesses. You can buy them in bulk and trim them to size, making them highly versatile for everything from blenders to hand mixers. Because they are soft, they won’t damage the cord’s insulation over time.
Binder Clips for Minimalist Management
If you are on a budget, look no further than your office drawer. A standard binder clip can hold a cord plug securely against the back of a counter or the underside of a cabinet. By removing the metal “wings” after you’ve clipped them, you get a clean, low-profile look. It keeps the plug end right where you need it, preventing it from falling behind the counter.
This trick is particularly useful for appliances that stay plugged in all the time. Instead of the cord snaking all the way to the wall, you can use a small binder clip to create a “parking spot” for the plug end at the back of the appliance. This keeps the workspace clear and ensures you don’t have to fish for plugs under heavy machinery.
Using Command Hooks to Tuck Cords Behind Appliances
Adhesive hooks are fantastic for routing cords. By sticking a small hook to the back of a heavy appliance, you can create a dedicated track for the cord. This forces the wire to sit flush against the back of the device, effectively hiding the bulk of the slack. It turns a messy, trailing cable into a streamlined, nearly invisible connection.
When choosing hooks, go for the clear, small-profile variety. They are less noticeable than the white plastic ones and blend into the back of your appliances better. Always clean the surface of the appliance with rubbing alcohol before applying the adhesive to ensure a permanent, secure bond that won’t give out due to heat fluctuations in the kitchen.
Professional-Grade Cord Management Solutions

Adhesive Cord Keepers and Cable Winders
There is a massive market for purpose-built cord keepers, and for good reason. These are usually small, silicone, or plastic devices that stick directly onto the surface of your appliance. They feature a central post or channel designed specifically to hold a coiled cord. Since they are low-profile, they stay out of the way, and they make it incredibly easy to “store” the plug when the appliance isn’t in use.
The benefit of these over DIY methods is the specialized geometry. They are engineered to hold the cord in place even when you are moving the appliance across the counter. Once you install them, you never have to think about the cord again; you simply wind it up when the appliance goes back into its “resting position.”
Silicone Cord Wrappers for Small Appliances
Silicone wrappers are popular because they are flexible and heat-resistant. They are designed to stay on your mixer or blender permanently. Because the material is soft, it won’t scratch your appliance finish, which is a major concern if you have high-end stainless steel or matte-finish gadgets.
They are perfect for appliances that you keep on the counter but only plug in once or twice a week. You can find them in various colors, so you can either make them blend in with the color of your appliance or choose a neutral shade that disappears against the background. They are an investment in the longevity of your appliance’s finish.
Dedicated Appliance Cord Storage Boxes
For areas where multiple power cords meet, like a coffee station, a cord management box is a lifesaver. You place your power strip inside the box, plug all your appliances into it, and close the lid. It hides the messy power strip and all the excess cable slack completely.
These boxes effectively act as a “black hole” for cables. It makes the “business end” of your kitchen look like a piece of high-end furniture rather than an electrical hub. Many of these boxes are designed with slots for the cords to exit, keeping everything organized and preventing them from getting tangled together inside the box. It is the single best way to make a busy coffee station look organized and intentional.
Strategic Planning for a Tangle-Free Workflow

Mapping Your Kitchen Outlets
Before you start buying gadgets, map out your kitchen. Where are your primary outlets located? If you have only one outlet for your coffee maker, toaster, and blender, you need to be realistic about what stays out and what gets put away.
Start by identifying the appliances that must be on the counter. If you have an appliance that is plugged in but sits five feet from an outlet, no amount of cord organization will make that look clean. Consider moving the appliance or using a high-quality, short extension lead that can be hidden behind the back of the counter. Proper placement is the first step in successful management.
The Power Strip Strategy
Many people rely on cheap power strips that eventually fail or create a fire hazard when overloaded. If you need more outlets, buy a heavy-duty, surge-protected power strip with a flat plug. The flat plug is essential because it allows the strip to sit flush against the wall, meaning you can push your counters or appliances back closer to the wall.
Mounting the power strip to the underside of your upper cabinets is a game-changer. It keeps the cables elevated and prevents them from ever touching the counter surface. When the wires are suspended, the counter remains perfectly clear, making it much easier to wipe down crumbs and spills.
Managing Seasonal Appliances
We often leave holiday-specific appliances or occasional-use gadgets on the counter just because we have the space. This is the biggest contributor to cord clutter. Only keep items on the counter that you use at least four times a week. Everything else should have a home in a drawer or pantry.
When you do store items, take two seconds to bundle the cord correctly. A loose, secure bundle held by a Velcro tie will prevent the “drawer monster” effect where you open a drawer only to find a tangled mess of cables that takes ten minutes to separate.
Advanced Tips for Long-Term Maintenance
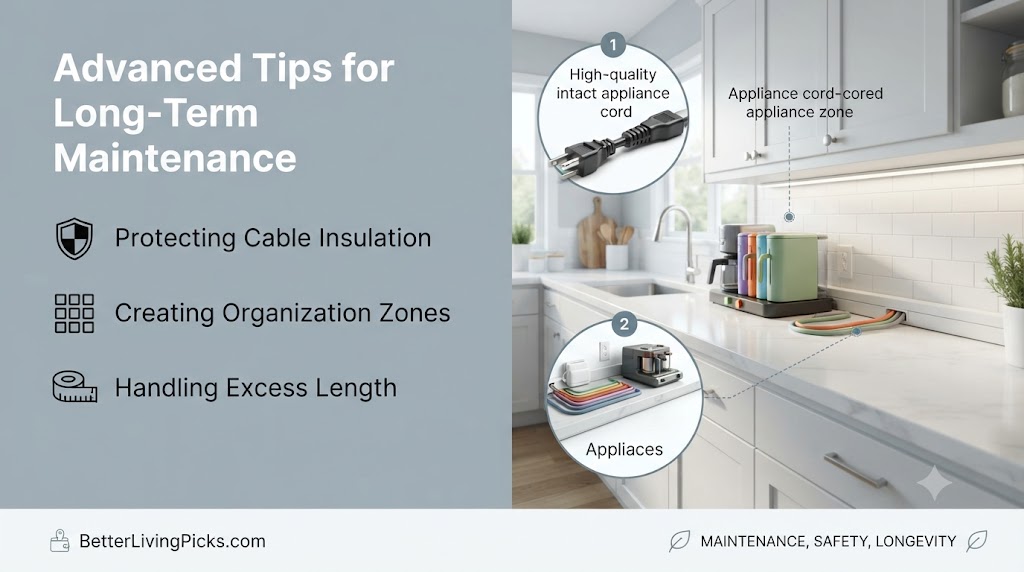
Protecting the Cable Insulation
Kitchen environments are tough on cables. Between the heat from ovens, the humidity from boiling water, and the occasional splash of grease, your appliance cords go through a lot. Avoid using harsh chemicals when wiping down your managed cords. Stick to a damp microfiber cloth to remove dust and residue.
If you notice the outer sheath of a cord starting to crack or fray, stop using the appliance immediately. Organization is important, but safety is paramount. If you see internal wires, the appliance needs to be professionally repaired or replaced; no amount of cord wrapping can fix a compromised electrical cord.
Creating “Zones” of Organization
A professional-looking kitchen is all about consistency. Apply the same cord management method to all appliances in a specific zone. If your coffee station uses adhesive silicone wrappers, make sure every appliance in that coffee station uses the same type of wrapper.
Visual consistency makes the kitchen look curated rather than cluttered. When your eye isn’t drawn to four different types of clips and ties, the room feels calmer and more inviting. Spend ten minutes setting up a standard “system” for your appliances, and you will find that maintaining it becomes second nature.
Handling Excess Length without Coiling
If you have an appliance with an exceptionally long cord, like some heavy-duty stand mixers and you have a decent amount of counter space, consider using a simple “cord channel” adhesive system. Instead of coiling the excess, these channels force the cable to run along the back edge of the appliance base, hiding it completely.
This is often safer than coiling because it doesn’t create a “lump” behind the appliance. It keeps the device stable and prevents it from wobbling, which is essential for high-vibration appliances like mixers.
Frequently Asked Questions
Do adhesive cord organizers damage countertops?
Generally, no. Most high-quality adhesive cord keepers use a command-style strip designed to come off clean. However, always test a small, inconspicuous area first if your counters are made of a porous material like natural stone. Avoid applying them to delicate, old, or peeling surfaces as the adhesive might be too strong for them.
What is the safest way to wrap cords without damaging internal wires?
The safest method is to avoid tight coils. Always wrap the cord in a wide, circular loop that maintains the natural curvature of the cable. Never fold the cord into a sharp, square-like shape, as this places immense stress on the copper wiring inside and will eventually lead to intermittent power issues and, potentially, short circuits.
How do I hide cords for appliances I rarely use?
If you rarely use the appliance, the best “hiding” method is to store it in a cabinet or drawer. If it must stay on the counter, use a decorative fabric or silicone wrap to bundle the cord tightly against the back of the appliance so that it effectively disappears from your line of sight.
Can I use zip ties for kitchen appliance cords?
You can, but they are not recommended. Zip ties are permanent once locked, making it impossible to adjust the cord length without cutting them. Furthermore, if you cut them too close to the cable, you run the risk of nicking the power cord’s protective insulation. Stick to Velcro or reusable silicone ties instead for better long-term usability.
Are there ways to hide cords without sticking things to my appliances?
Yes, you can use cord management sleeves or spiral wraps that slide over the cord itself. Another option is to use tension-mounted cord covers that run along the back of your counter. These systems hide the wires without requiring any permanent adhesive on your devices, which is perfect if you are renting or have appliances you plan to sell or upgrade soon.
What should I do if my appliance cord is too short to reach the outlet?
You should use a short, high-quality extension cord specifically rated for the appliance’s power draw. Ensure the extension cord is tucked securely behind the appliance or along the backsplash. Never daisy-chain multiple extension cords together, as this increases the risk of overheating and fire hazards in your kitchen environment.
Final Thought
A clean, organized kitchen is not just about aesthetics, it’s about creating a space where you actually want to spend time. Dealing with appliance cords might seem like a small detail, but the difference in your daily workflow is massive. When your surfaces are clear, cleaning is easier, cooking is faster, and the entire kitchen feels more professional and welcoming.
Take the time to evaluate your current setup. Identify which cords are causing the most chaos, pick one of the methods we covered today, and spend ten minutes tackling those tangled wires. You will find that an organized kitchen leads to a more relaxed cooking experience, allowing you to focus on the recipe in front of you rather than the clutter surrounding it. Start small, stay consistent, and enjoy your newly reclaimed space.