

Use compressed air to clear debris. If ineffective, apply 99% isopropyl alcohol to the switch stem and cycle the switch 50–100 times to break down internal grime.
2. Cleaning Safety Rules:
Never use water; it causes permanent corrosion. Only use high-purity isopropyl alcohol (90%+), which evaporates instantly and is safe for internal electronic contact leaves.
3. Identifying Terminal Failure:
If professional-grade cleaning fails, the internal metal leaf is likely oxidized or physically worn. This indicates a dead switch that requires physical replacement or desoldering.
4. Prevention Strategy:
Maintain a snack-free workspace, utilize a keyboard dust cover when the device is idle, and perform a light monthly dusting to prevent particulate accumulation.
There is nothing more frustrating than mid-game or mid-work when your keyboard starts acting like it has a mind of its own. You press a key once, and suddenly a string of repetitive letters appears on your screen. This is known as key chatter, a common mechanical keyboard issue that makes typing chaotic and gaming nearly impossible. Many users wrongly assume their mechanical switches are permanently broken, leading them to discard perfectly good hardware or spend hundreds of dollars on replacements.
The good news is that most mechanical keyboard issues are not caused by hardware failure, but by environmental debris. Over time, dust, skin oils, crumbs, and microscopic particles find their way inside the switch housing. These materials interfere with the sensitive internal metal contacts, causing them to bounce or create erratic electrical signals. You do not need to be an engineer to fix this. With the right tools and a bit of patience, you can restore your keyboard to factory-fresh performance. This guide will walk you through every step of identifying, cleaning, and repairing your switches to get your typing rhythm back on track.
Identifying the Root Cause of Key Chatter
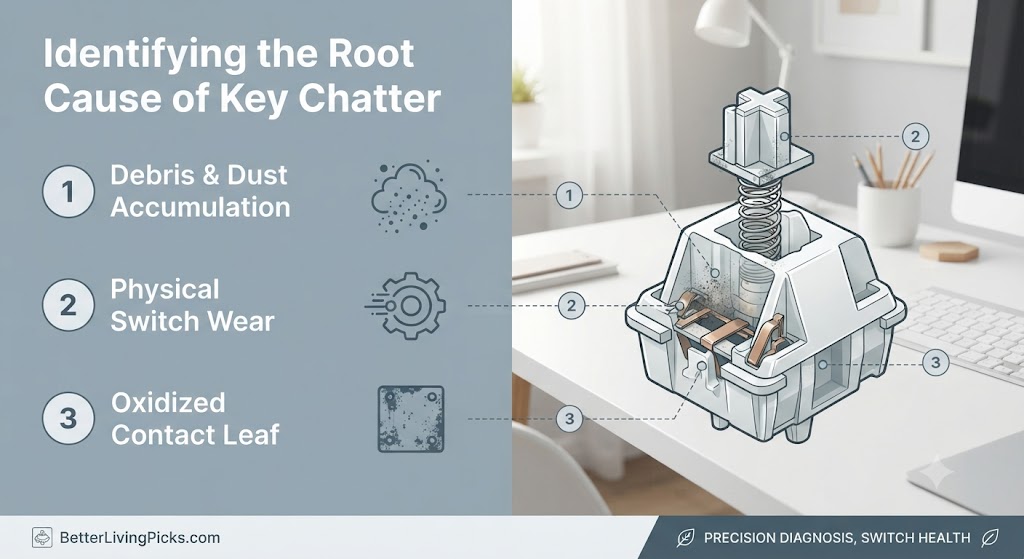
Why Keys Double-Type (The Mechanical Reality)
Mechanical switches are impressive pieces of engineering, but they rely on a simple physical mechanism. When you press a key, a plastic stem moves downward, forcing two metal contact leaves together to complete an electrical circuit. This signal is then sent to your computer to register the keystroke.
Under ideal conditions, this contact is crisp and immediate. However, when debris, such as dead skin cells, pet hair, food crumbs, or even liquid residue, enters the switch housing, it settles on these contact leaves. This material acts as an insulator or an obstacle. Instead of a clean connection, the metal leaves make erratic, partial contact. This rapid, inconsistent connection is interpreted by the keyboard’s controller as multiple keystrokes in a fraction of a second. This is what we identify as “chatter.”
Signs Your Switch is Dirty vs. Broken
Distinguishing between a dirty switch and a failed one is vital. A dirty switch usually displays intermittent problems. It might work perfectly for an hour, only to begin double-typing during a specific session. You might also notice a slight change in the “feel” or resistance of the key. It may feel gritty or slightly slower to return to the upright position.
A broken switch, by contrast, usually has a more definitive set of symptoms. If the key feels physically “crunchy” or if it offers zero tactile feedback (in a tactile switch), the plastic housing or the internal spring may be physically compromised. If you have cleaned the switch thoroughly and it still refuses to register any input, or if it registers only with extreme pressure, it is time to accept that the internal components are likely damaged and require replacement.
Quick Fixes Without Disassembly
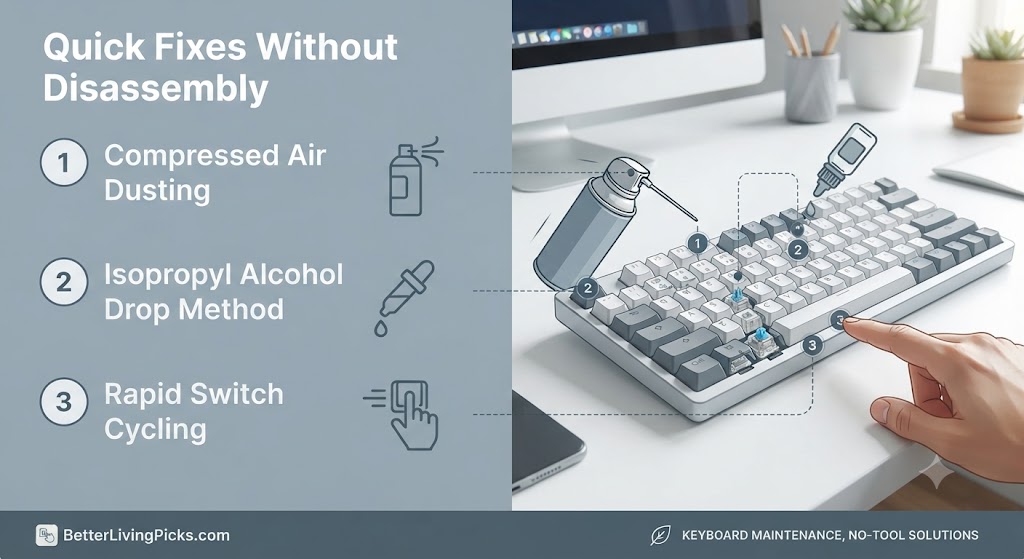
The Power of Compressed Air
Before you consider using any liquids, always start with air. Compressed air is the gold standard for removing non-sticky debris.
- Unplug your keyboard: This is a safety precaution for your computer’s ports.
- Tilt the board: Hold the keyboard at a 45 to 90-degree angle. This allows gravity to help the dislodged debris fall out rather than deeper into the switch.
- Short bursts: Use short, controlled bursts of air. Direct the straw around the base of the switch stem.
- Agitate: While spraying, press the switch rapidly. This movement helps open up the internal space, allowing the air to reach deeper into the housing.
Software Solutions as a Temporary Bridge
If you are in the middle of a project and cannot perform a physical cleaning, you can utilize software “debounce” settings. Many custom mechanical keyboard firmwares, such as QMK or Via, allow you to adjust the “debounce time.” By increasing this value, you tell the keyboard to ignore subsequent signals from the same switch for a few extra milliseconds after the first press. It does not fix the physical issue, but it effectively masks the chatter until you have time for a proper repair.
The Alcohol Trick (The Drop Method)
If compressed air fails, the issue is likely stickiness or oxidation. This is where 99% isopropyl alcohol becomes your best friend.
- Preparation: Ensure the keyboard is disconnected.
- Access: Remove the keycap.
- The Drop: Use a small dropper or a needle-tip bottle to place one, or at most two, drops of alcohol into the hole of the switch stem.
- Agitation: This is the most critical part. Begin pressing the switch immediately. Do this rhythmically and quickly for at least 60 seconds. You are essentially using the alcohol as a solvent to break down the grime, and the movement of the switch acts as a manual scrub.
- Patience: Let the board sit for at least 30 to 60 minutes. Because 99% isopropyl alcohol has very little water content, it will evaporate quickly, leaving no conductive residue behind.
Deep Cleaning Sticky Switches

Removing Keycaps Properly
Many people damage their switches by pulling keycaps off at the wrong angle or with the wrong tools. Never use a flathead screwdriver or a butter knife. These tools exert uneven pressure and can crack the plastic stem of the switch or scratch the mounting plate.
Invest in a wire-style keycap puller. These tools provide an even, upward pull that keeps the stress centered on the keycap, protecting the fragile switch stem. Wiggle the puller slightly as you pull to loosen the friction, and always pull straight up. If you are cleaning the entire board, take a high-resolution photo of your layout before starting so you don’t play a guessing game during reassembly.
The Science of Isopropyl Alcohol for Switches
You might wonder why we stress 99% alcohol. High-percentage alcohol is essential because it is non-conductive and hygroscopic, meaning it absorbs water. Standard 70% rubbing alcohol contains 30% water, which is enough to cause rust on the metal contact leaves over time. By using 99% alcohol, you ensure that as it dries, it pulls any moisture out of the housing, effectively “cleaning and drying” in one step. This is the safest way to treat internal electronic components without professional-grade ultrasonic cleaners.
Mastering the Cycling Technique
The “cycling” of the switch, the act of pressing it repeatedly, is often underestimated. If you only apply alcohol and wait, the grime remains trapped inside. When you press the switch, the internal slider rubs against the housing, and the metal leaves rub against each other. This physical friction is necessary to dislodge stubborn residue. If you have a particularly sticky switch, you may need to repeat the alcohol drop and cycle process two or three times. Between cycles, verify that the switch feels smoother and that the “scratchy” resistance is gone.
When to Replace the Switch

Understanding Hot-Swappable Boards
If you own a modern, hot-swappable mechanical keyboard, you are in luck. These boards feature small, socketed holes on the circuit board (PCB) that allow you to pull a switch out and push a new one in without a single drop of solder. To fix a persistent chatter issue on these boards, simply pull the bad switch with a switch puller, discard it, and replace it with an identical new one. It is a 30-second fix that completely eliminates the chatter.
Desoldering Basics for Fixed Boards
If your switches are soldered to the PCB, the task is more involved. You will need:
- A soldering iron: Ideally one with adjustable temperature settings.
- A solder sucker (desoldering pump): To remove the molten solder.
- Replacement switches: Ensure they match your current mounting style (3-pin or 5-pin).
Start by opening your keyboard casing to expose the back of the PCB. Identify the two pins corresponding to the problematic switch. Heat the solder joint until it flows, then immediately engage your desoldering pump. Once the solder is removed from both pins, the switch should fall out or require only a gentle pull. Insert your new switch, ensure it is flush with the board, and apply fresh solder to both pins. Take your time—the biggest risk is overheating the PCB and damaging the conductive traces.
Preventing Future Issues

Establishing Snack-Free Typing Zones
It is a simple rule, but it is the most effective. Crumbs are the number one cause of switch failure. A single grain of sugar or a small piece of a cracker falling into a switch housing can cause a week of frustration. By making your desk a “no-food zone,” you dramatically increase the lifespan of your keyboard.
Implementing Routine Maintenance
Think of your keyboard like a car; it requires periodic maintenance.
- The Monthly Shake: Once a month, unplug your keyboard, flip it upside down, and give it a firm shake over a trash can. You will be surprised at how much dust falls out.
- Dust Covers: If you have an expensive custom board, consider a rigid plastic dust cover. It keeps pet hair and ambient dust from settling into the switches while the board is idle.
- Surface Wiping: Use a damp, not wet microfiber cloth to wipe down the keycaps. This prevents dead skin oils from building up and eventually dripping into the switch housing.
Frequently Asked Questions
How do I know if my switch is actually broken?
If you have performed the alcohol-drop cleaning process twice, allowing sufficient drying time, and the key still chatters or fails to register entirely, the internal metal contacts have likely suffered from metal fatigue or permanent oxidation. At this stage, the component has reached the end of its life, and replacement is the only viable solution.
Can I use WD-40 on my mechanical switches?
You should never use standard WD-40 on a mechanical keyboard. While it is a great lubricant, it is formulated to displace water and prevent rust on heavy machinery. It is not designed for sensitive electronic contacts and will leave a sticky, oily residue that attracts more dust than ever before. If you must lubricate, use only specialized keyboard-grade lubricants like Krytox or Tribosys.
Why does only one key chatter?
Chatter is usually caused by localized contamination. Debris rarely settles evenly across all 104 keys. It disproportionately affects the keys you use most often, such as the spacebar, the “WASD” cluster, or the frequently typed letters like “e” and “a.” These keys see the most movement, creating more opportunities for friction and dust buildup.
Does gaming with sticky keys ruin the switch?
Gaming with a sticky switch forces the plastic internal stem to move in ways it was not designed to. If the key feels like it is rubbing or grinding, you risk snapping the plastic stabilizers or deforming the housing. If you feel resistance, stop using that key immediately. It is better to rebind your keys in your game settings than to destroy the hardware.
How often should I clean my mechanical keyboard?
A simple, non-invasive maintenance routine should be done monthly. A deep clean, which involves pulling all the caps and using compressed air to clear the plate, is sufficient every three to six months. Do not feel the need to perform deep cleans too often; constant disassembly increases the risk of accidentally breaking keycap stems.
Is it worth soldering a new switch if the board is cheap?
If your keyboard is a budget model costing under $50, the time and effort required to desolder and replace a switch might exceed the value of the board itself. However, treat it as a learning experience. Developing soldering skills is incredibly valuable for a hobbyist. If the board is a premium or custom model, replacing a single switch is certainly worth the effort to save an otherwise expensive piece of equipment.
Fixing your keyboard doesn’t have to be a daunting task. Most of the time, the ghost in your machine is just a tiny bit of dust that found the wrong place to land. By keeping up with routine maintenance and acting quickly when you notice the first sign of a double-type, you can keep your mechanical board running for years. Take your time, be patient with the alcohol-drop method, and enjoy the feeling of a perfectly responsive, crisp typing experience once again.