
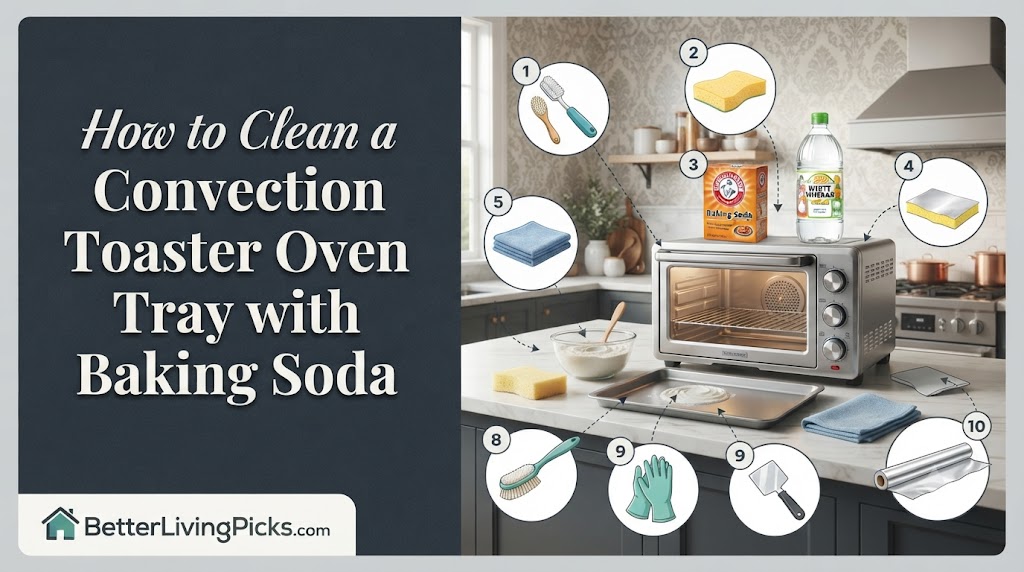
Mix baking soda with enough water to create a thick, spreadable paste. Apply it liberally over the burnt spots and let it sit for at least 30 to 60 minutes to penetrate the grime.
2. Will baking soda damage my toaster oven tray?
Baking soda is a mild abrasive. It is safe for most stainless steel and aluminum trays. If your tray has a delicate non-stick coating, use a soft nylon brush instead of a metal scouring pad.
3. Is the vinegar “fizz” method effective?
Yes, adding a splash of vinegar over the baking soda creates a chemical reaction that helps lift stubborn, hardened carbon deposits. Use this for heavy buildup, but be ready for a brief, foamy reaction.
4. How can I prevent grease from sticking in the future?
Always line your tray with parchment paper or aluminum foil before cooking. This creates a barrier, making cleanup as easy as throwing away the liner and giving the tray a quick wipe.
You pull the tray out of your convection toaster oven, and it looks like a miniature war zone of burnt cheese, charred meat drippings, and stubborn carbonized crumbs. You have likely tried scrubbing it with standard dish soap and a sponge, only to end up with sore arms and a tray that still feels tacky and discolored to the touch. It is incredibly frustrating when you just want to roast some vegetables or bake a quick snack, only to have the kitchen fill with the acrid smell of yesterday’s burnt mess.
The secret to saving your sanity and your appliance, isn’t a harsh, eye-stinging chemical cleaner from the hardware store. It is likely sitting in your pantry right now. Baking soda is a true powerhouse at breaking down stubborn, carbonized grease without stripping away the specialized finish of your pan. In this guide, we are going to look at why this works, the common pitfalls that make cleaning harder than it needs to be, and the exact, repeatable steps to restore your tray to its original shine.
Why Baking Soda is the Best Choice for Toaster Oven Trays

Avoiding Harsh Chemicals on Food Surfaces
When you use heavy-duty oven cleaners, you often introduce unnecessary risk into your kitchen. These cleaners are frequently packed with lye, sodium hydroxide, and strong solvents that are designed to strip layers of gunk away aggressively. The problem is that these chemicals are difficult to rinse off completely.
If you don’t achieve a perfect rinse, you risk leaving toxic chemical residues on a surface that will eventually touch your food. Baking soda, conversely, is food-safe. It is the same ingredient you use in your pancakes and cookies. Using it to clean your tray provides peace of mind, as even a small amount of residue is harmless.
The Science of Baking Soda and Grease
Baking soda, or sodium bicarbonate, is a mildly alkaline substance. Grease and food buildup are typically acidic in nature. When these two meet, the baking soda works to neutralize the acidity and saponify the fats. Saponification is the chemical process of turning fats into a soap-like substance that is water-soluble.
Beyond the chemistry, baking soda provides physical benefits. It exists as fine, microscopic crystals. When you create a paste, these crystals act as a gentle abrasive. Unlike steel wool or harsh scouring powders that leave permanent scratches in the finish of your tray, baking soda scrubs away the top layer of burnt grease without damaging the metal underneath.
Preparing Your Tray for the Deep Clean
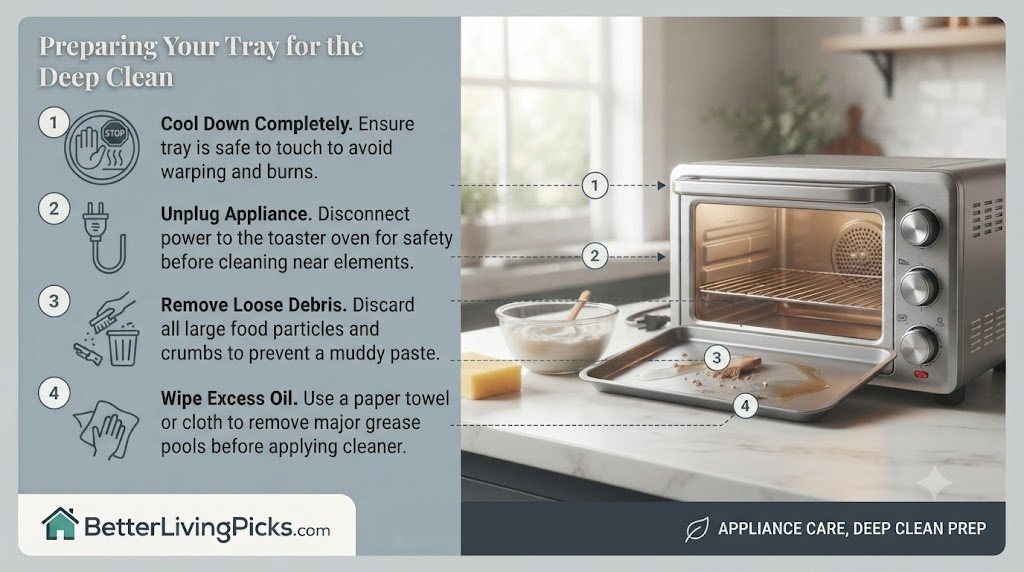
Safety First: Cool Down and Unplug
We have all been tempted to start cleaning up while the appliance is still warm, thinking the heat might help. This is a mistake. Cleaning a hot tray can cause the metal to warp or result in a nasty burn. Furthermore, applying water or a cold cleaning paste to a hot surface can release steam and splatter oils in ways you don’t want.
Always allow the tray to reach room temperature before attempting to clean it. While you wait, double-check that your toaster oven is unplugged. While you are likely cleaning the tray in the sink, it is always a best practice to ensure the heating elements are powered down when working with wet supplies near electrical components.
Removing Loose Crumbs and Debris
The most common mistake people make is trying to apply a cleaning paste directly over a tray covered in loose crumbs, bits of crust, and dried-on debris. This turns your cleaning paste into a gritty, muddy sludge that is far less effective at targeting the actual baked-on oils.
Take your tray to the sink or a trash can and use a dry paper towel or a soft brush to knock off all the loose, dry debris. Once the surface is clear of loose particles, use a slightly damp cloth to wipe up any pools of excess oil. By clearing this first layer of “top-level” mess, you allow the baking soda to go directly to work on the bonded grease.
The Step-by-Step Baking Soda Scrub

Creating the Perfect Paste Consistency
The effectiveness of this entire process relies on the consistency of your paste. You are aiming for a texture that mimics thick, creamy peanut butter or frosting. If your mixture is too watery, it will simply run off the tray and leave the burnt areas unprotected. If it is too dry, it will crumble off the moment you apply it.
Start with a half-cup of baking soda in a small, non-reactive bowl. Add water about one teaspoon at a time. Mix slowly. You want the paste to be thick enough that it holds its shape even if you hold the tray at a slight angle. If you accidentally add too much water, just add another spoonful of baking soda to bring it back to that ideal, spreadable density.
Application Techniques for Stubborn Burnt Spots
Use an old spoon, a silicone spatula, or even a credit card to smear the paste over the tray. Don’t be shy with the application. For areas with heavy, black, carbonized spots, apply a thick, opaque layer. You should not be able to see the metal beneath the paste in these target areas.
Think of this step like applying a face mask or a heavy-duty grout cleaner. The paste needs to be in direct contact with the grease to break it down. Apply the paste with a gentle, pressing motion to ensure it fills any tiny scratches or textured areas where grease loves to hide.
The Critical Wait Time for Maximum Penetration
If you rush this step, you will be disappointed. Baking soda needs time to chemically react with the grease. For a light cleaning, 30 minutes may be sufficient. However, for a tray that hasn’t seen a deep clean in months, you need at least one hour.
If you have the time, leaving the paste on the tray overnight is the ultimate “lazy” cleaning hack. The long contact time allows the baking soda to thoroughly soften the hardened carbon bonds. When you return in the morning, the grease will often wipe away with a simple stroke, requiring almost no elbow grease at all.
Advanced Techniques for Heavy Grease Buildup

The Baking Soda and Vinegar Fizz Method
Sometimes, the buildup is just too stubborn for a plain paste. This is when you call in the “fizz” reinforcements. Keep your baking soda paste applied to the tray, then grab a spray bottle filled with white vinegar. Lightly mist the vinegar over the baking soda patches.
You will see an immediate, vigorous reaction. This is the acid in the vinegar reacting with the alkaline baking soda. This process releases carbon dioxide gas, which physically agitates the surface. The bubbling action works to lift the grease away from the metal pores. This is particularly effective for the seams and corners of the tray where grime tends to collect and harden into impossible-to-reach ridges.
Dealing with Hardened Carbon Deposits
After the fizzing has died down, you still need to put in a little physical effort. Use a stiff-bristled nylon brush to scrub the paste into the spots. The combination of the softened grease and the abrasive soda will turn the mixture into a grey, oily slurry.
If you do not have a scrub brush, a fantastic alternative is a ball of wadded-up aluminum foil. It is surprisingly effective at scrubbing stubborn, hard spots without causing the deep gouges that steel wool can inflict. Use circular motions, putting enough pressure to move the grit, but not so much that you bend the tray.
Proper Rinsing and Drying to Prevent Rust
Rinsing is just as important as the scrubbing phase. Use hot, running water to wash away all the baking soda residue. You might need to use a clean sponge to wipe the surface as the water runs, ensuring that you aren’t leaving a white, cloudy film behind. This residue can often become “re-baked” onto the pan if you don’t remove it fully, making your next cleaning job even harder.
Once the tray looks clean, dry it immediately with a lint-free cloth or a fresh paper towel. Moisture is the enemy of metal trays. If you allow the tray to “air dry,” small droplets of water can sit in the corners or on the surface, potentially causing water spots or, in the case of carbon steel pans, the early stages of rust.
Maintenance Tips to Keep Your Tray Clean Longer
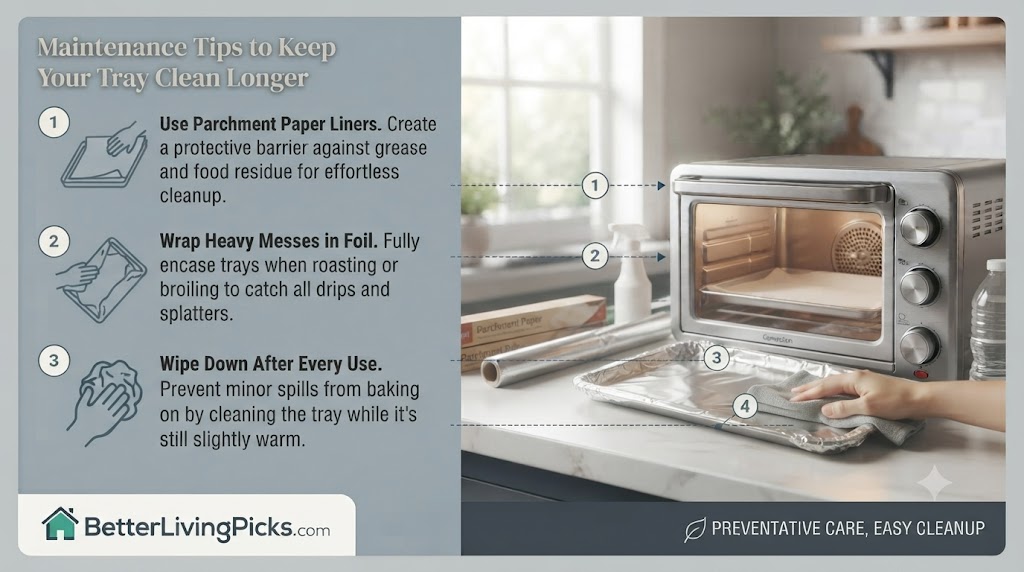
Using Parchment Paper and Aluminum Foil
Prevention is infinitely better than the cure. The absolute best way to manage a toaster oven tray is to avoid letting the grease touch the metal in the first place. For roasting veggies or meats, parchment paper is your best friend. It is non-stick, heat-resistant, and can simply be tossed in the trash when you are finished.
If you are cooking something particularly messy or oily, use heavy-duty aluminum foil. You can wrap it around the tray, creating a complete barrier. When dinner is done, you simply lift the foil off, and your tray remains perfectly pristine underneath. It turns a 20-minute scrubbing project into a 5-second task of tossing the foil.
The “Wipe-Down” Routine After Every Use
We often ignore the tiny specks of grease that remain on the tray after a meal. We tell ourselves, “It’s only a small spot, it’ll be fine.” This is how grease builds up over months. The heat of the next cooking session effectively “seasons” that leftover grease onto the pan, hardening it into a permanent stain.
Get into the habit of performing a ten-second wipe-down. Once the tray has cooled enough to handle, use a damp soapy cloth to wipe the surface. It doesn’t need to be a deep scrub, just a quick removal of the fresh oil. By keeping the surface clean between uses, you effectively reset the clock on your next deep-cleaning session.
Frequently Asked Questions
Is baking soda abrasive enough to scratch my tray?
Baking soda is remarkably gentle. Its hardness on the Mohs scale is very low, meaning it is safe for almost all toaster oven surfaces, including stainless steel and aluminum. While it is technically an abrasive, it is far less aggressive than steel wool or industrial scouring pads. If you are worried about a specific high-end tray, just apply the paste and let the chemical reaction do the work so you don’t have to scrub aggressively.
Can I use this method on non-stick coated trays?
You can, but you need to adjust your technique. Never use steel wool, scouring pads, or even a stiff wire brush on a non-stick coating. Use a very soft nylon sponge or a microfiber cloth. The goal is to let the baking soda paste break down the oils so you can gently wipe them away without ever needing to use force that might compromise the non-stick surface.
How long should I let the paste sit for best results?
Thirty minutes is generally enough for mild, everyday messes. However, if you are dealing with thick, black, baked-on grease, you should aim for at least one hour. For extremely neglected trays, leaving the paste on for two to four hours or even overnight, is perfectly safe and will significantly reduce the amount of physical scrubbing you need to do later.
What if the grease is still stuck after one try?
Some older, deeply baked-on carbon deposits may require a second round. If this happens, don’t just repeat the exact same process. Add a teaspoon of liquid dish soap into your baking soda paste. The surfactants in the dish soap help cut through the oil, while the baking soda continues to tackle the carbon. The combination of these two is almost always enough to defeat even the most stubborn grime.
Can I use vinegar with baking soda every time?
You can use them together, but you don’t necessarily have to. The “fizz” reaction is most useful when you need to mechanically lift hardened debris from the surface. For routine maintenance or lighter messes, a simple baking soda and water paste is perfectly effective and keeps your supply costs lower. Save the vinegar for those days when the grease seems genuinely impossible to remove.
Is it safe to put the tray in the dishwasher?
Most convection toaster oven trays are not designed to withstand the high heat and harsh chemicals found in standard dishwasher detergents. The process can cause the protective finish on the tray to peel, flake, or discolor, eventually leading to faster rust and more sticking. While it might be tempting, hand-washing your tray with the baking soda method will keep it in good condition for years longer than a dishwasher ever could.
Final Thought
Cleaning your convection toaster oven tray does not have to be a dreaded, multi-hour ordeal. By mastering the simple, non-toxic power of baking soda, you can easily restore your tray to a like-new state, avoiding the need for harsh chemicals or expensive, specialized cleaners. Once you integrate the small, consistent habits of using parchment paper and performing a quick post-cooking wipe-down, you will find that deep-cleaning sessions become rare and incredibly manageable.
Treat your tray with a little bit of care today, and it will continue to serve you well for years to come. Whether you are baking homemade cookies, roasting vegetables for a family dinner, or simply reheating leftovers, a clean tray ensures that your food always tastes exactly how it should. You have the knowledge and the simple tools needed to keep your kitchen equipment performing perfectly, now go get those pans sparkling.

