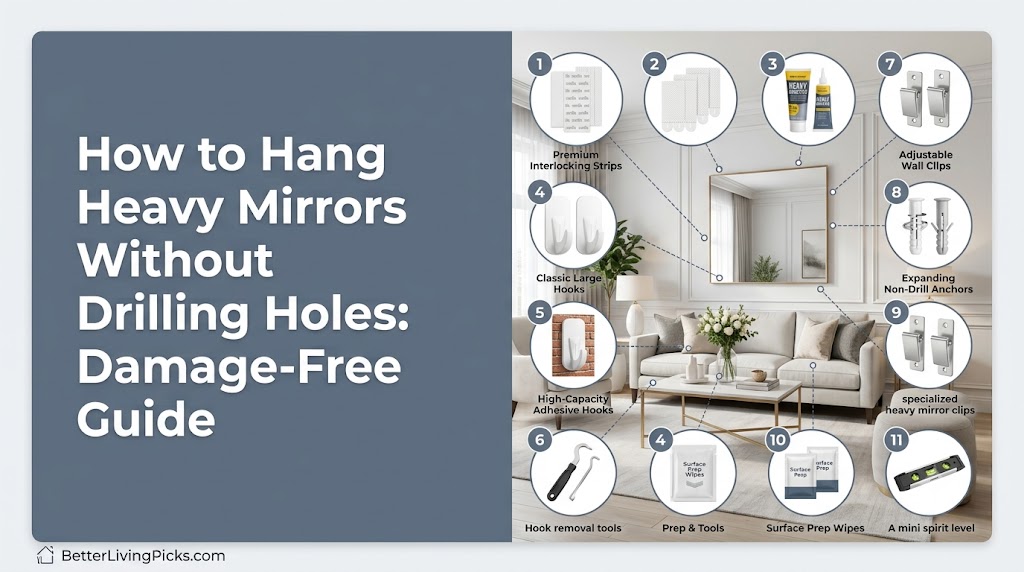
Staring at a massive, gorgeous mirror resting on your floor while holding a lease agreement that explicitly forbids drilling holes is a special kind of home decor heartbreak. You know the drill, literally but you can’t use it. Instead, you’re left wondering if those standard sticky tabs from the grocery store will end in a midnight crash and a floor full of shattered glass. The anxiety of guessing whether your drywall can handle the shear stress without a stud anchor is enough to make you leave the mirror leaning against the wall indefinitely.
Yes, but only up to 15–20 pounds maximum. You must use authentic, heavy-duty interlocking strips, clean the wall thoroughly with rubbing alcohol, and apply even pressure for 30 seconds per strip to guarantee a solid bond.
2. What is the best drill-free tool for heavy mirrors?
No-drill drywall hooks (like Monkey or Gorilla Hooks) are the absolute best choice. They puncture drywall with a tiny pinhole and use spring-steel tension to hold up to 50 pounds without tools.
3. How do I prevent the mirror from leaning forward?
Add small rubber bumpers or extra adhesive strips to the bottom corners of the mirror frame. This evens out the spacing, keeps the mirror parallel to the wall, and prevents dangerous top-heavy shifting.
4. How do I remove heavy-duty adhesives safely?
Never pull straight out. Warm the adhesive with a hairdryer for 30 seconds to soften the glue, then use a piece of dental floss or fishing line in a sawing motion behind the strip to slice it off cleanly.
Let’s cut through the internet fluff: you absolutely can hang a heavy mirror without a power drill, but you cannot afford to guess the weight or skimp on surface preparation. If you ignore the physics of wall tension or skip cleaning the drywall, gravity will win every single time. Here is the exact blueprint to securely mount your mirror, trouble-shoot the common failure points, and keep your walls entirely intact.
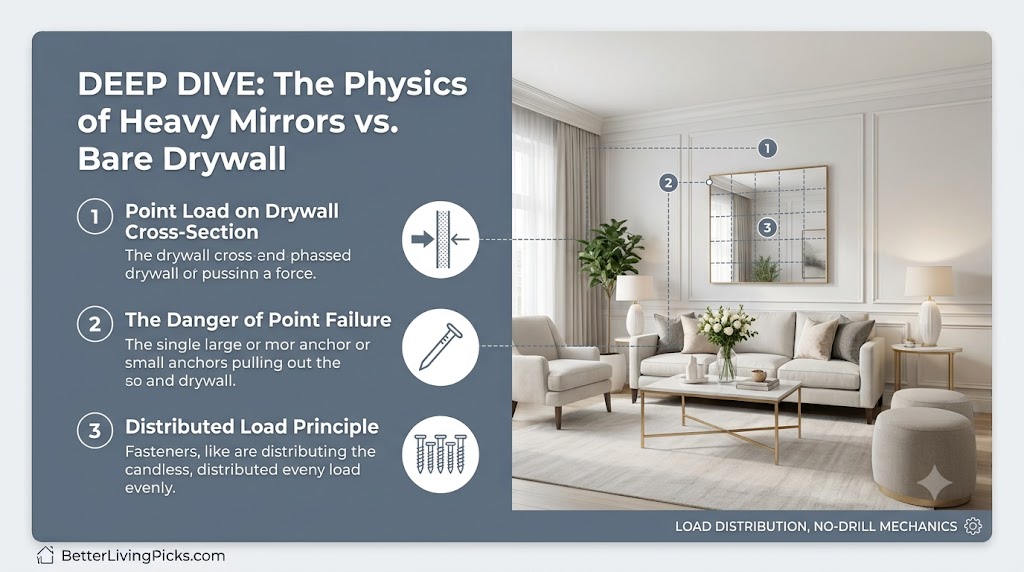
The Physics of Heavy Mirrors vs. Bare Drywall
Why regular tape fails (The shear stress reality check)
Standard double-sided tape or cheap foam strips fail because they are designed for tensile strength (pulling straight out) rather than shear stress (the downward, sliding force exerted by gravity on a heavy mirror). When you place a 15-pound mirror on standard tape, the adhesive molecules slowly stretch and tear under constant downward pull. Within days, or even hours, the bond shears completely, resulting in a sudden, dangerous drop. To combat this, you must use interlocking fasteners or mechanical hooks that convert downward shear into inward compression against the drywall structure itself.
Weight limits and structural limits of unanchored drywall
Standard half-inch drywall is surprisingly strong under compression, but it is incredibly brittle when subjected to concentrated, localized weight. A bare nail or a poorly placed screw will simply saw through the gypsum core under the weight of a heavy mirror.
Before mounting anything without a stud, you must understand your limits. Unanchored drywall can reliably support up to 10 pounds using specialized adhesive methods, and up to 50 pounds if you use specialized spring-steel hooks that distribute the load across a wider internal surface area of the wall board. Exceeding these limits without anchoring directly into a wooden stud is a recipe for structural wall failure.
| Hanger Type | Max Safe Weight (Drywall Only) | Best Wall Condition |
| Heavy-Duty Interlocking Strips | 15 lbs | Flat, smooth paint (No texture) |
| Spring-Steel Drywall Hooks | 50 lbs | Standard 1/2″ or 5/8″ Drywall |
| Hardwall Hangers (Plastic Pins) | 25 lbs | Plaster or concrete block walls |
The No-Drill Toolkit: What Actually Works (and What’s a Myth)

Heavy-Duty Adhesive Strips: Max capacities and surface rules
The internet loves to recommend hook-and-loop adhesive strips for everything, but they have strict limitations. Brands like Command make heavy-duty versions that can hold up to 16 pounds per set, but those ratings apply only under perfect conditions.
The surface must be completely non-porous, untextured, and clean. If your wall features a heavy orange-peel or knockdown texture, adhesive strips cannot form a continuous molecular bond. The air gaps beneath the tape will drastically reduce the holding power by up to 70%, meaning your 15-pound mirror is highly likely to come crashing down.
No-Drill Drywall Hooks (Monkey Hooks & Gorilla Hooks)
If your mirror weighs over 15 pounds and your wall is made of drywall, stop looking at adhesives and buy a pack of spring-steel drywall hooks. These ingenious tools require zero power tools. You simply push the sharp tip directly through the drywall by hand, twist it, and the long curved tail locks firmly against the back of the drywall panel.
Because the hook uses the back of the wall for leverage, it converts downward weight into outward tension against the entire sheet of drywall. Brands like Gorilla Hooks can support up to 50 pounds in standard drywall while leaving a hole no larger than a tiny finish nail.
Tension Rod Systems and Leaner Mirror Strategies
When dealing with exceptionally heavy mirrors (60+ pounds) or delicate plaster walls that can’t take punctures, the smartest “no-drill” method is often a structural pivot. Oversized floor mirrors, often called leaner mirrors, are intentionally designed to rest their weight directly on the floor while leaning against the wall at a slight 5- to 10-degree angle.
To make this setup completely safe without drilling structural anchors, you should install heavy-duty rubber grip pads to the bottom base of the frame to stop slipping, and utilize a sleek tension rod system braced between the floor and ceiling behind the mirror for stability.
Step-by-Step Blueprint: Hanging Your Mirror Without a Drill
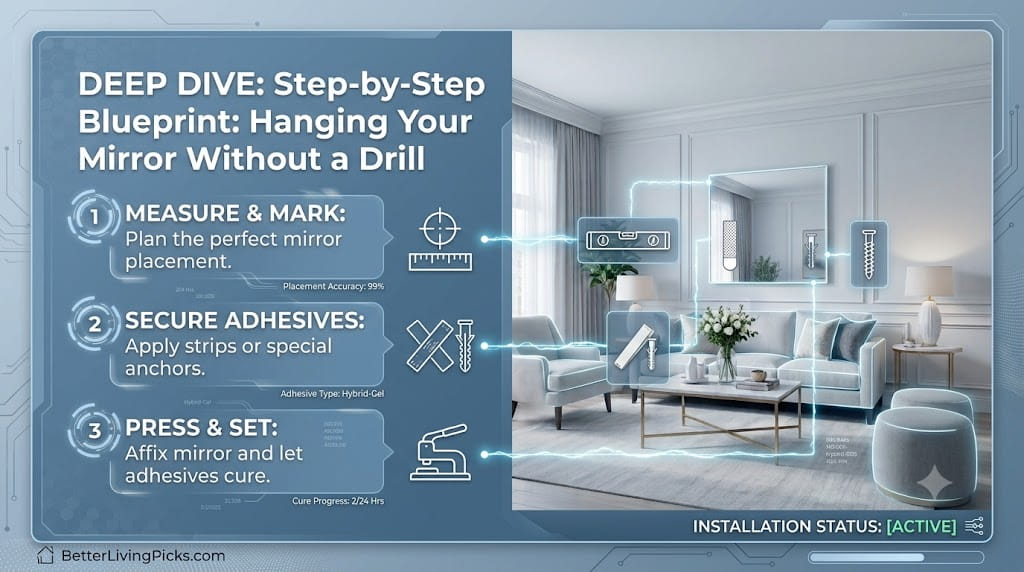
Step 1: Prepping the surface (The crucial rubbing alcohol step)
The single most common cause of adhesive failure is invisible wall grime. Household dust, airborne cooking oils, and leftover film from cleaning sprays create a microscopic barrier between the adhesive and your paint.
Do not use household glass cleaners or multi-surface sprays; they leave behind slick silicone residues. Instead, saturate a clean microfiber cloth with 70% isopropyl rubbing alcohol and vigorously scrub the exact area where the strips will sit. Let it air-dry completely for 10 minutes before applying any hardware.
[Isolate Wall Area] ➔ [Scrub with 70% Isopropyl Alcohol] ➔ [Air Dry 10 Mins] ➔ [Ready for Adhesive]
Step 2: Weight calculation and hardware matching
Never guess the weight of your mirror. A bathroom mirror that looks light can easily weigh 18 pounds due to a thick MDF backing or iron framing. Use a digital bathroom scale: weigh yourself first, then weigh yourself holding the mirror, and subtract the difference.
Once you have the precise weight, match your hardware conservatively. If your mirror weighs 12 pounds, do not use a system rated for exactly 12 pounds. Always over-spec your hardware by at least 50% to account for environmental factors like humidity or accidental bumps.
Step 3: Precise marking without pencil stains
When you aren’t using a drill, you don’t get a second chance to level your hardware—especially with adhesives that bond instantly. Avoid drawing heavy pencil lines across your wall, which can smear and ruin flat latex paint.
Instead, place a strip of low-tack painter’s tape across the wall slightly below where the mirror will sit. Use a bubble level to ensure the tape is perfectly straight, then draw your precise alignment marks directly onto the painter’s tape. Once your hooks or adhesives are mounted, simply peel the tape away for a flawless, clean finish.
Step 4: Installation and the 30-second pressure rule
If you are using heavy-duty adhesive strips, the magic happens during the initial compression phase. The adhesive layer is pressure-activated; it requires force to transform from a firm state into a semi-liquid that flows into the microscopic pores of your wall’s paint.
Press the strip against the wall with the heel of your hand and apply firm, continuous pressure for a minimum of 30 full seconds. Once applied, do not hang the mirror immediately. The adhesive requires a minimum of 1 hour to cure and fully harden before you subject it to any weight.
Real-World Friction: Common Mistakes and How to Fix Them

Issue: The adhesive is peeling off the paint
If you install an adhesive strip and it immediately begins to curl away from the wall, taking a layer of paint with it, your wall has a fundamental compatibility issue. This typically occurs on homes painted with modern “easy-clean” or stain-resistant paints containing Teflon or silicone.
- The Fix: You cannot use adhesives on these specialized coatings. You must pivot immediately to a mechanical solution like spring-steel hooks, or mount the mirror via a leaning configuration with rubberized base grips to completely bypass the slick paint surface.
Issue: The mirror is tilting forward from the top
When you hang a mirror via a wire or loops on its back frame, the center of gravity often shifts forward. This causes the top of the mirror to pull outward, tilting away from the wall, which drastically increases the pull-out force on your no-drill hardware.
- The Fix: You need to equalize the distance at the bottom. Apply a set of thick, self-adhesive rubber bumpers or a small block of dense foam to the bottom two corners of the mirror’s back frame. This forces the bottom of the mirror out to match the top, keeping the entire unit parallel to the wall and stabilizing the load.
Issue: Humidity in bathrooms weakening the bond
Bathrooms are notorious graveyard environments for adhesive strips. The high humidity and constant temperature cycling from hot showers quickly penetrate the adhesive backing, softening the acrylic glue until it shears away from the wall.
- The Fix: Standard adhesive strips will fail here. You must specifically purchase moisture-resistant adhesive versions designed for bathrooms, or use a purely mechanical option like hardwall plastic anchor pins that mechanically bite into the wall surface and are completely unaffected by ambient moisture.
How to Safely Remove No-Drill Hardware Without Tearing Drywall
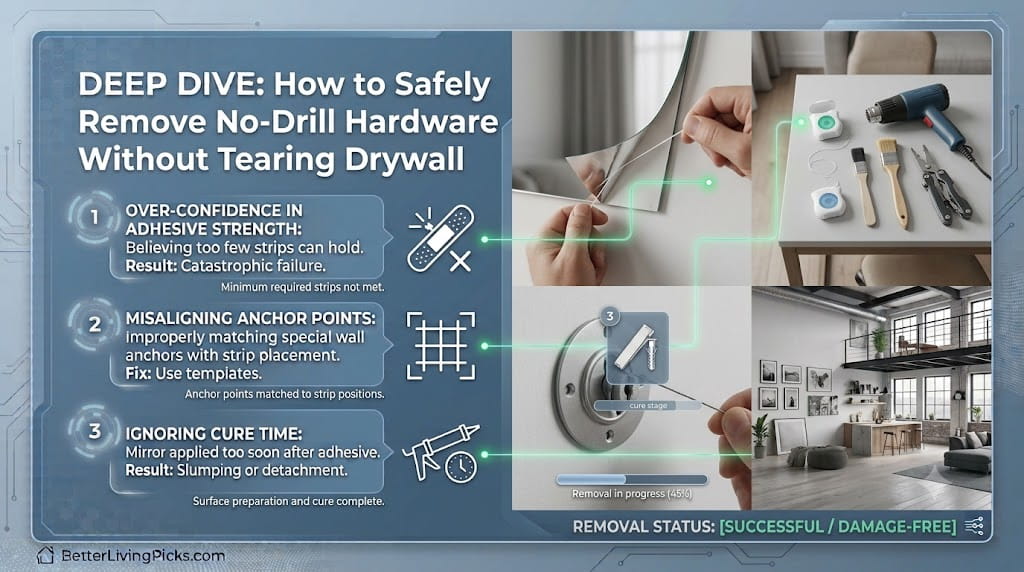
The dental floss trick for adhesive backing
When it’s time to move out, never grab the edge of an adhesive strip and yank it straight away from the wall. This concentrates all the pulling force on a tiny patch of drywall paper, which will immediately tear, leaving you with an expensive patching job.
Instead, grab a long strand of standard dental floss or high-test nylon fishing line. Warm the adhesive strip with a hairdryer on medium heat for 30 seconds to soften the bond. Slide the floss behind the top edge of the strip, press it tight against the wall surface, and use a steady, sawing motion downward. The floss will cleanly slice right through the foam core of the adhesive, leaving the wall completely intact. Any remaining sticky residue can be gently rolled off using your thumb or a drop of adhesive remover.
Patching tiny puncture holes from spring-steel hooks
While spring-steel hooks like Monkey Hooks don’t require drilling, they do leave a clean, circular 1/16-inch puncture hole when pulled out. Luckily, fixing this is incredibly simple and takes less than two minutes.
Take a pea-sized dab of standard interior spackling paste on the tip of your finger and press it directly into the hole, wiping away any excess material so it sits flush with the paint. Once dry (usually 15 minutes), touch up the tiny spot using a Q-tip dipped in a small sample bottle of your original wall paint. The repair will be completely invisible to your landlord.
Frequently Asked Questions
Can I hang a heavy mirror with command strips if the wall is textured?
No, you should avoid using adhesive strips on heavy orange-peel, knockdown, or popcorn textured walls. The uneven surface prevents the adhesive from making full contact, which severely compromises its holding strength. Use spring-steel hooks instead.
How much weight can a monkey hook hold without a stud?
A standard single spring-steel monkey hook can reliably hold up to 35 pounds in standard 1/2-inch drywall. Heavy-duty variations (often called Gorilla Hooks) are thicker and can hold up to 50 pounds safely without hitting a stud.
Will no-drill methods damage my rental apartment walls?
Adhesive strips leave zero damage if removed properly using heat and a sawing motion. Spring-steel hooks leave a tiny 1/16-inch pinhole that can be patched seamlessly in seconds with a dab of spackle, making both options highly rental-friendly.
Is it safe to use no-drill hooks on plaster walls?
No, spring-steel hooks cannot puncture plaster walls; they will bend or crack the brittle plasterboard. For plaster or brick walls, you must use specialized hardwall plastic hangers that utilize tiny hardened steel pins to tap into the surface.
How long do I need to wait before hanging the mirror on adhesive strips?
You must wait a minimum of 1 hour after applying the strips to the wall before hanging the mirror. This crucial window allows the pressure-activated polymer adhesive to fully cross-link and cure against the painted surface. Hanging it early guarantees failure.
What should I do if my mirror has a pre-attached wire on the back?
If your mirror uses a hanging wire, do not use adhesive strips, as the wire pulls forward and creates massive peeling leverage. Instead, install two spring-steel hooks spaced a few inches apart on the wall, then rest the wire evenly across both to distribute the weight.
Final Thought
Taking the extra time to plan out your hardware setup, weigh your mirror accurately, and aggressively scrub down your drywall pays huge dividends. It turns what could be a stress-inducing decor gamble into a highly reliable, rock-solid project. By choosing the right tool for your specific wall condition and respecting the curing times, you get to enjoy a gorgeous, perfectly leveled statement piece exactly where you want it. Best of all, when moving day rolls around, you’ll be able to pack up your mirror and clear out your space without leaving behind a single trace of damage or jeopardizing your hard-earned security deposit.