We have all been there. You buy a gorgeous roll of self-adhesive wallpaper, spend an hour mapping out your feature wall, and within ten minutes of sticking it up, your wall looks like it has a case of the chickenpox. Giant, stubborn air pockets ruin the seamless look you wanted, and trying to aggressively slide them to the edge usually results in a permanently stretched crease or a torn panel.
Bubbles happen when air is trapped by dropping too much sticky backing onto the wall at once, or when micro-debris, dust, and fresh paint gasses prevent the adhesive from bonding flat.
2. What is the best technique to prevent trapped air?
Expose only 6 to 12 inches of backing paper at a time. Use a flexible, felt-edged squeegee to smooth the material firmly using short strokes working from the center outward.
3. How do you fix a bubble that is already trapped?
If it is near the edge, gently peel the panel back and re-smooth it. For isolated bubbles in the middle, poke a tiny pinprick in the center, warm it with a hairdryer, and press the air out.
4. Can you install peel and stick wallpaper on textured walls?
No, heavy textures allow air pockets to hide in the recesses, causing the adhesive to fail. Stick to smooth, primed, and completely cured walls for a bubble-free bond.
The truth is, trapping air bubbles isn’t a stroke of bad luck; it is almost always caused by rushing the prep or peeling too much backing paper off at once. If you try to fight the material by pulling it tight or forcing trapped air down a long panel, you will lose every single time. To get a perfectly flat finish, you need to change how you introduce the vinyl to the wall.
The Anatomy of a Wallpaper Bubble: Why It Happens
Understanding why these pockets form saves you hours of frustration. Air gets trapped when the sticky backing seals around an area before that area is flattened down. If the adhesive forms a perimeter ring, the air inside has nowhere to go.
Leftover Dust and Wall Micro-Debris
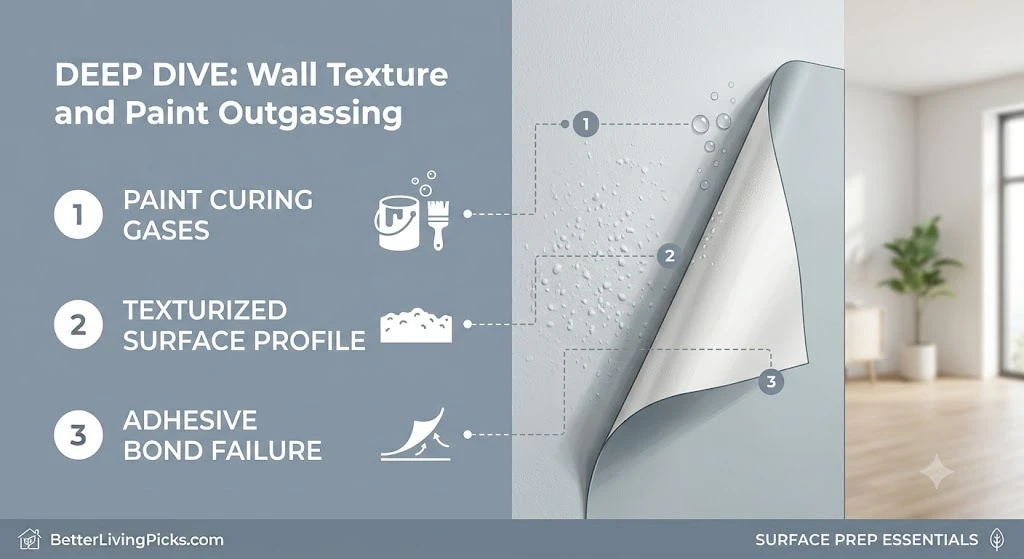
Even a single grain of drywall dust can ruin a panel. When the paper passes over dirt, it lifts slightly, creating a tiny tent that traps a pocket of air. If you don’t deep-clean the surface first, you are essentially sticking your wallpaper to a layer of loose powder instead of the actual wall.
Trapped Air Pockets from Improper Pulling
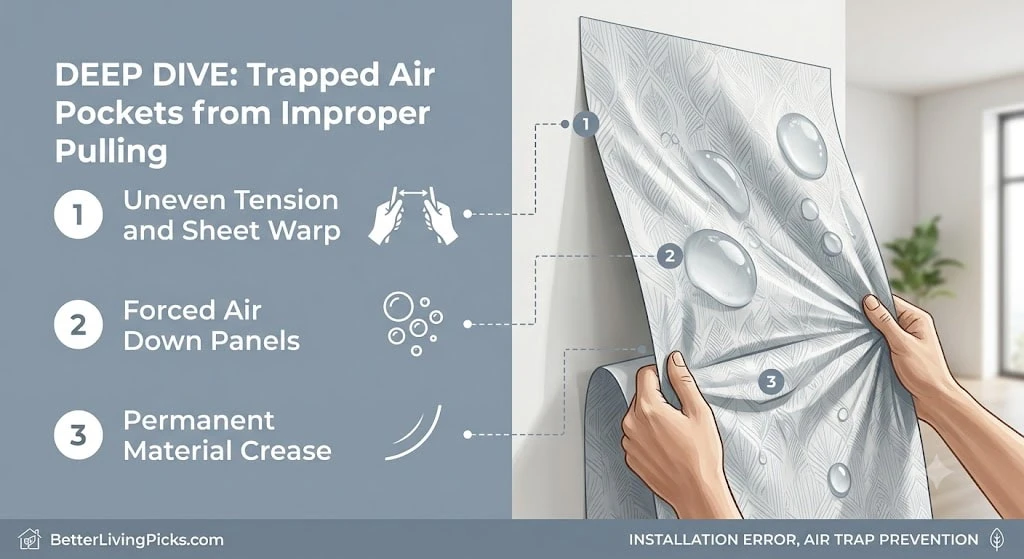
When you pull the wallpaper panel downward from the bottom with force, you create tension across the vinyl sheet. This tension prevents the middle of the sheet from resting naturally against the wall surface. As you smooth it, the uneven tension warps the sheet and locks air bubbles right under the middle sections.
Wall Texture and Paint Chemical Outgassing
Textured walls are a magnet for air pockets because the paper can only make contact with the high points of the wall bumps. Additionally, if you recently repainted, walls undergo chemical outgassing for weeks. These microscopic gas bubbles lift the adhesive, creating a bubbly mess days after a seemingly perfect install.
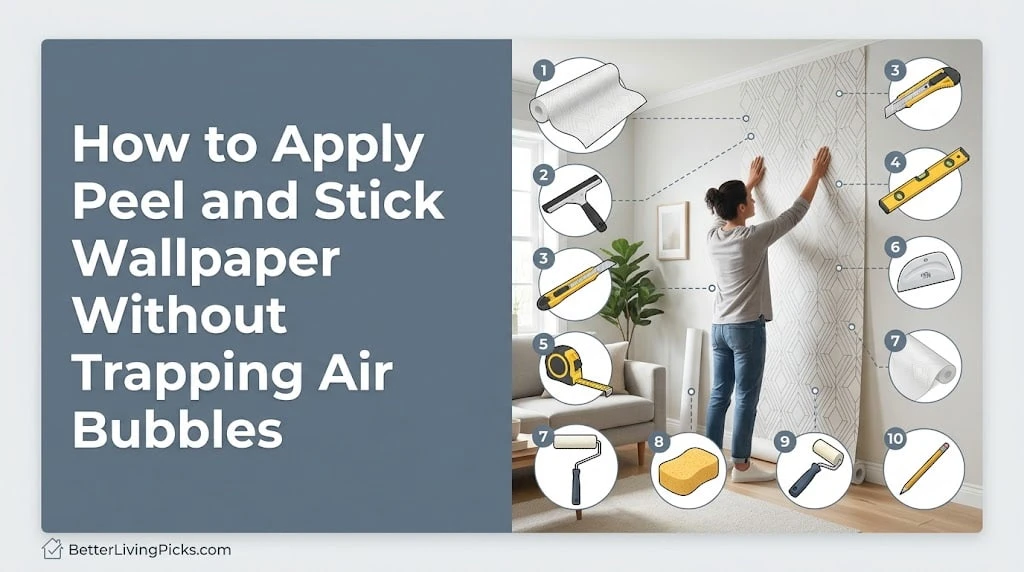
Essential Tools: What You Actually Need (and What to Skip)
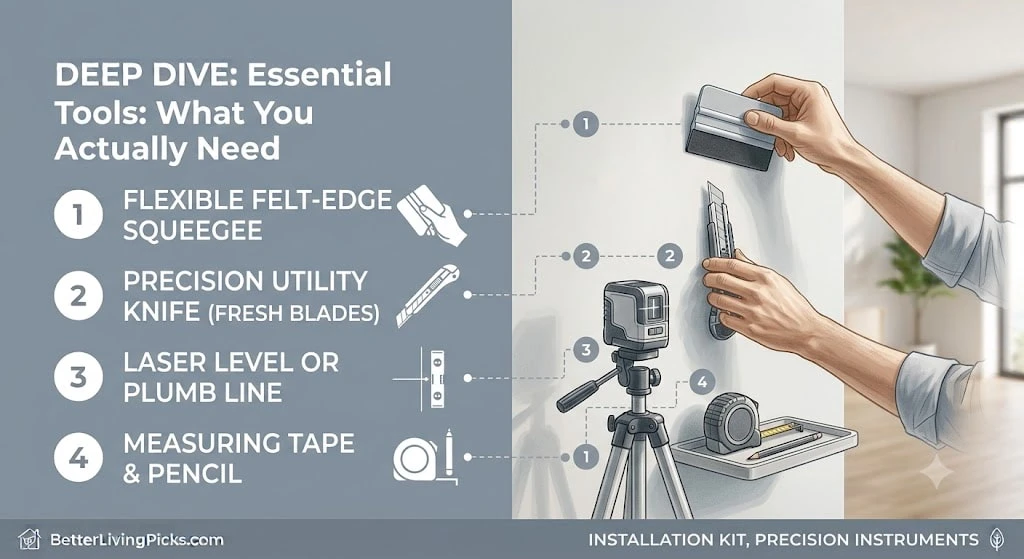
You do not need a massive commercial toolkit, but using the wrong household items will ruin your vinyl paper. Throwing whatever is in your junk drawer at the wall will only end in scratched patterns and sliced panels.
The Flexible Smoother vs. The Hard Plastic Scraper
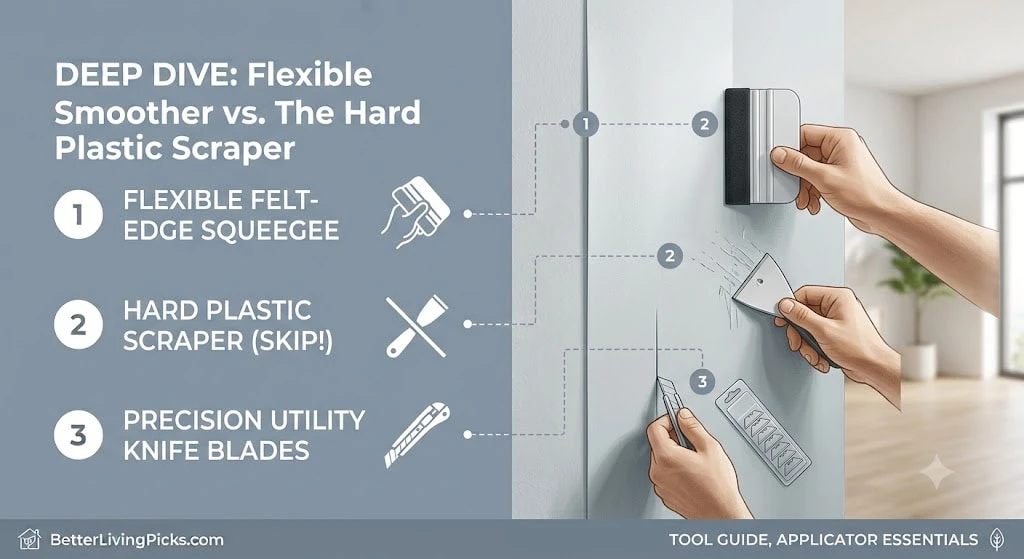
Never use a hard plastic putty knife or a bare credit card to smooth out your paper. They have sharp, unforgiving edges that catch on the vinyl, leaving scratches or tearing the pattern completely.
Instead, buy a flexible squeegee with a soft felt edge. The felt side glides smoothly over the wallpaper without friction, allowing you to press down firmly without any risk of damaging the print.
+------------------------------------+------------------------------------+
| TOOL TYPE                          | REAL-WORLD EFFECT ON VINYL         |
+------------------------------------+------------------------------------+
| Hard Plastic Scraper / Credit Card | Scratches ink, catches edges, tears|
| Felt-Edged Squeegee (Recommended)  | Glides smoothly, applies even force|
| Soft Microfiber Cloth              | Good for finishing, bad for bubbles|
+------------------------------------+------------------------------------+
Why Utility Knife Blades Must Be Snapped Constantly
A dull blade does not cut wallpaper; it drags and rips it. Dull metal pulls the sticky backing away from the wall at the corners, letting a rush of fresh air underneath the edges.
Keep a snap-off utility knife by your side and break off the tip after every two vertical cuts. A fresh, razor-sharp edge ensures clean lines at the baseboards and ceiling lines without pulling the paper out of place.
Step-by-Step Guide: Hanging Wallpaper Completely Flat
Hanging self-adhesive paper cleanly is all about patience and small movements. Follow this systematic approach to ensure your panels lay down like a second skin.
Phase 1: The Critical 24-Hour Prep Window
Start by washing your walls down with a mixture of isopropyl alcohol and water to strip away oils and dust. Let the walls dry completely for a minimum of 24 hours before you even unpack your wallpaper rolls.
Bring your wallpaper rolls into the room during this timeframe so the material can acclimate to the temperature and humidity of the space. Vinyl expands and contracts with atmospheric changes, so skipping this step leads to shifting and bubbling later.
Phase 2: Setting the Perfect Vertical Plumb Line
Never trust a corner, door frame, or baseboard to be perfectly straight. If your first panel goes up even a fraction of an inch crooked, you will naturally pull and twist the subsequent panels to try and line up the pattern match.
This twisting introduces massive structural wrinkles and air pockets that are impossible to smooth out. Use a laser level or a traditional plumb line to draw a perfectly straight vertical line down the wall for your very first panel edge to follow.
Phase 3: The “Peel-As-You-Go” Incremental Reveal Technique
Do not peel the entire paper backing off the panel at the start of your run. Pull back only the first 6 to 12 inches of backing from the top edge and fold it sharply backward.
Line up the top of the exposed vinyl with your ceiling line, lightly tacking it to the wall. This keeps the rest of the sticky backing safely covered so it cannot accidentally touch the wall out of turn and trap massive pockets of air.
Phase 4: Overlapping and Squeegeeing From the Center Out
With the top section tacked, take your felt squeegee and work in a sweeping motion from the exact center outward to the left edge, then from the center outward to the right edge. Use overlapping, downward angles like an inverted “V” shape.
Once that section is flat, reach up underneath the panel, pull down another 6 inches of backing paper, and repeat the central outward sweeping motion. Working in small increments pushes any potential air out of the open sides before it gets trapped.
       [ WALLPAPER PANEL ]
               |
        /-- Center --\    <-- Sweep Left & Right
       /              \
      /--- Center ---\   <-- Move down 6 inches, repeat
     /                \
Crucial Mistakes That Ruin the Adhesive Backing
Sometimes the worst damage happens before the paper even touches the wall surface. Avoid these two common installer habits to keep your project on track.
Stretching the Material While Pulling
Removable wallpaper is made of flexible vinyl blends that stretch easily under pressure. If you grab the bottom of a panel and yank it downward to straighten a crease, you are permanently deforming the vinyl pattern.
Once you release that tension, the vinyl tries to shrink back to its original shape on the wall, lifting away from the drywall and creating massive, loose air bubbles. Always lift and reposition; never stretch.
Peeling Off the Entire Backing Paper At Once
When you peel the full backing off, you have a giant, static-charged sheet of exposed adhesive swinging around in the air. It will twist, stick to itself, catch dust floating through the room, and aggressively grab onto the wall before you can align it.
Once it sticks erratically like that, flattening out the resulting bubbles is an impossible uphill battle. Keep the backing on until the moment that specific section is ready to be smoothed down.
How to Fix Bubbles That Appear After Installation
Even with an immaculate technique, a stray air bubble or two might show up overnight as the adhesive sets into place. Do not panic; you can fix them without tearing down the entire wall.
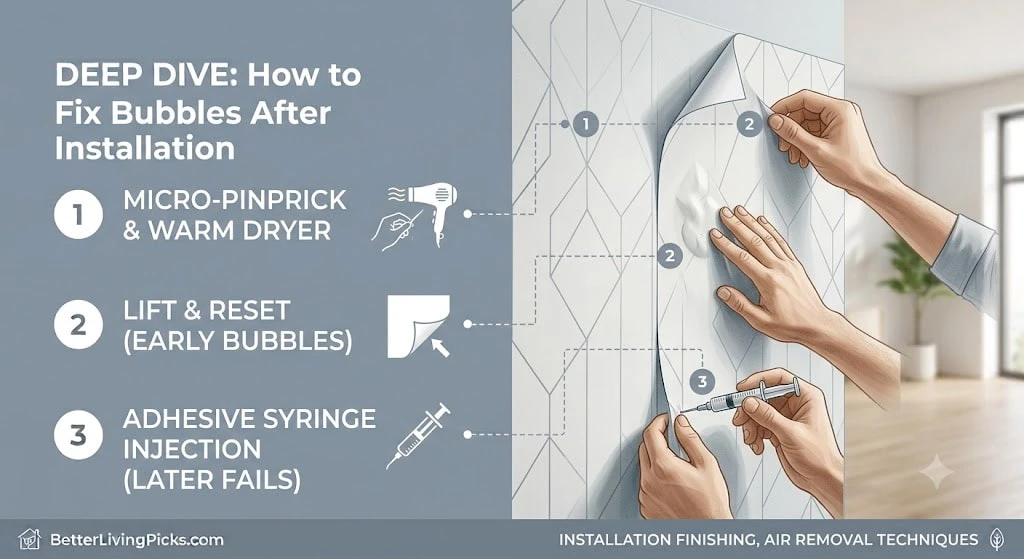
The Micro-Pinprick and Warm Hairdryer Method
For small, stubborn bubbles that sit right in the middle of a panel, do not try to drag them all the way to the edge with your squeegee, as this will stretch the vinyl. Instead, take a very fine sewing needle and pierce the exact center of the bubble once.
Set a hairdryer to low, warm heat and hold it a few inches away from the spot for five seconds to soften the vinyl. Use your thumb to gently press the air out through the tiny pinhole, and the warm vinyl will flatten down and seal the hole.
When to Peel Back vs. When to Inject Adhesive
If you notice a large cluster of bubbles within a few hours of installation, peel the panel back immediately past the problem zone and re-smooth it down properly. Peel and stick adhesive is designed for repositioning during the first day.
However, if you find a loose bubble weeks later that is caused by an adhesive failure, peeling it back will tear the surrounding bond. In this scenario, poke a small hole, insert the tip of a fine-nozzle wallpaper adhesive syringe, inject a tiny dot of glue, and roll it flat.
Frequently Asked Questions
Can I use a damp cloth instead of a squeegee to remove air bubbles?
A damp cloth can be used for light finishing work, but it lacks the structural rigidity needed to push stubborn air pockets out from under heavy vinyl. A cloth tends to bunch up, which can accidentally create fabric creases that press new wrinkles into your fresh wallpaper layout.
Why did my wallpaper develop bubbles a week after installation?
This delayed bubbling is almost always caused by wall outgassing or shifting humidity levels. If the wall was painted recently and did not cure for at least three weeks, the escaping paint vapors will collect under the wallpaper, creating fresh air pockets long after your installation is complete.
Should I pop every single wallpaper bubble with a razor blade?
No, never use a razor blade to pop a bubble because it creates a straight slice line in the vinyl material. As the wallpaper naturally expands and contracts over time, that slice will pull apart, exposing a visible line of drywall beneath; always use a round needle instead.
What should I do if the wallpaper backing tears and gets stuck?
If the paper backing splits and sticks to the adhesive side, do not try to scrape it off while hanging. Carefully pull that entire section back away from the wall, use a piece of strong painter’s tape to grab the torn backing edge, peel it away cleanly, and then resume your install.
Does wall primer help prevent peel and stick wallpaper bubbles?
Yes, a premium matte or satin primer creates a completely uniform, non-porous surface that allows the self-adhesive backing to form an airtight bond. Raw drywall or chalky flat paints absorb the adhesive tack unevenly, leading to early failure and lifting air pockets.
Take Your Time for a Flawless Finish
Transforming a room with peel and stick wallpaper is incredibly satisfying, but it demands respect for the process. If you treat the installation like a race, your walls will show every rushed movement in the form of deep lines and pockets.
Slow down your approach, work in tiny increments, and always brush from the center outward to clear the path ahead. With a clean wall, a fresh blade, and a felt-edged squeegee in hand, you will get that glassy, professional look on your very first try.