
Begin by establishing a soft ambient base with overhead fixtures or flush mounts, then add functional task lighting where you read or cook, and finish with accent layers to highlight artwork or architectural features.
2. Why does my living room feel flat even with lights on?
Relying solely on a single central ceiling light creates harsh shadows and flattens room depth. Fix this by turning off the overhead and distributing warm floor lamps, table lamps, and picture lights across different heights.
3. What color temperature should I choose for a cozy aesthetic?
Stick strictly to 2700K warm white bulbs for living spaces and bedrooms. Avoid anything above 3500K unless you are working in a garage or kitchen workspace, as cooler tones destroy cozy ambiances.
4. Can I layer lights in a rental without wiring new fixtures?
Absolutely. Use plug-in wall sconces, rechargeable puck lights under cabinets, and heavy-duty floor lamps plugged into smart dimming plugs to achieve a high-end layered look instantly.
I remember staring at my living room after a fresh coat of paint, wondering why the space still felt cold and sterile. The culprit wasn’t the furniture or the color palette; it was entirely the lighting. I had fallen into the classic trap of relying on a single, blazing overhead ceiling fixture that cast harsh shadows and made the room feel like a doctor’s waiting room.
Transforming a space requires moving away from single-source illumination and adopting a multi-layered design philosophy. By combining ambient, task, and accent lighting at varying heights, you completely alter the mood and texture of a room. Let’s break down how to master aesthetic lighting design from scratch.
Switching to 2700K smart dimmable LED bulbs across all lamps is the single highest-impact upgrade you can make. They offer seamless brightness control, preserve warm tones without yellow distortion, and deliver incredible energy efficiency for long-term home styling.
Understanding the Three Pillars of Lighting
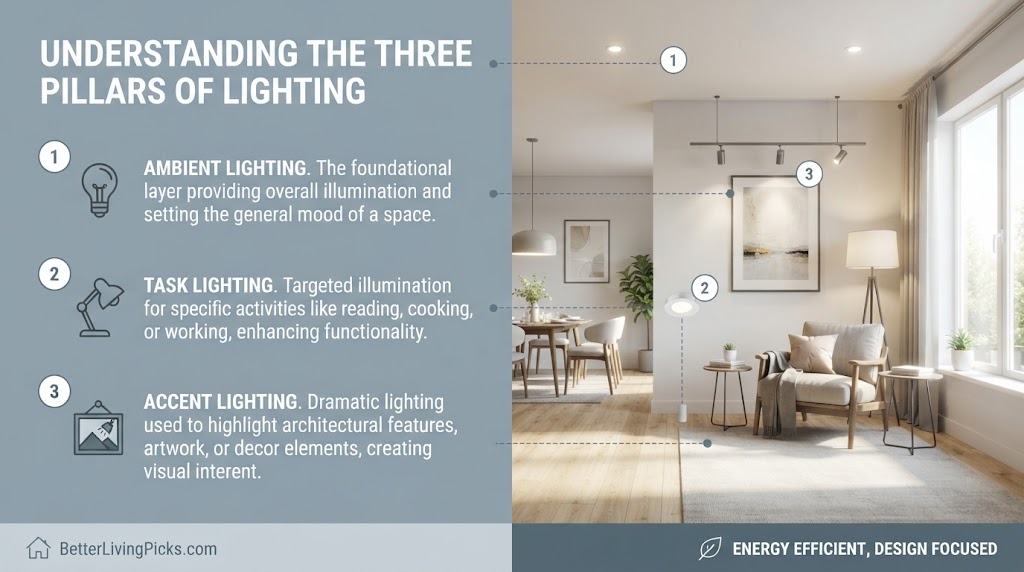
Ambient Lighting (The Foundation)
Ambient lighting provides the overall illumination for a room. It replaces natural sunlight when evening rolls around. Think of it as the canvas upon which the rest of your design is painted.
If your ambient light is too bright, the room feels clinical. If it’s too dim, you’ll trip over your coffee table. The secret is keeping ambient sources diffused and soft.
Flush mounts, chandeliers, and indirect cove lighting serve this purpose well. Whenever possible, run these fixtures on a dimmer switch so you control the baseline mood.
Task Lighting (The Functional Layer)
Task lighting is targeted illumination designed to help you perform specific activities. This includes reading, cooking, grooming, or working on a laptop.
Without task lighting, your eyes strain and rooms lose functionality. I learned this the hard way while trying to meal prep under a poorly placed kitchen ceiling light that cast my shadow directly onto the cutting board.
Adding under-cabinet LED strips, desk lamps, or adjustable reading sconces solves this immediately. Keep task lights focused directly on the work surface rather than spraying light everywhere.
Accent Lighting (The Drama Layer)
Accent lighting is pure personality. It adds depth, drama, and visual interest by drawing attention to specific focal points.
Use accent lights to highlight textured brick walls, prized artwork, indoor plants, or architectural bookshelves. Picture lights and directional track spotlights excel here.
When you turn off ambient and task lights and leave only accent lighting glowing, your room transforms into a moody, high-end sanctuary. It creates pockets of shadow and light that make spaces feel larger and more dynamic.
Mapping Out Your Room Before Buying a Single Bulb
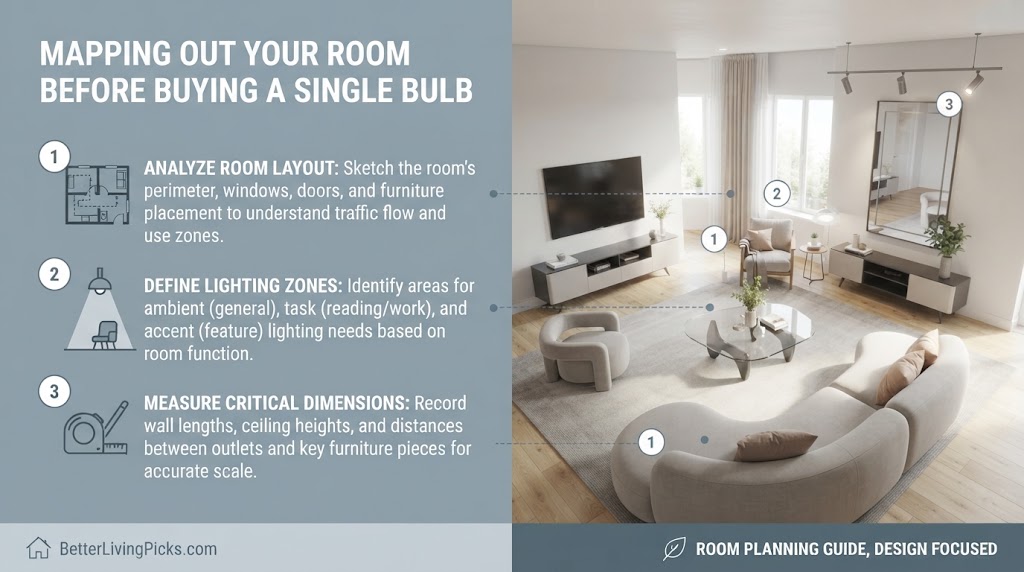
Evaluating Natural Light Sources
Before you buy a single lamp or fixture, track how natural light moves through your room throughout the day. North-facing rooms receive cool, consistent light, while south-facing rooms flood with intense warmth.
Take note of dark corners that natural light never reaches. These spots will become the anchor points for your secondary and tertiary lighting layers.
Design your lighting layout to complement daylight rather than fight against it. A corner that feels dreary at 4 PM needs a dedicated floor lamp with a warm bulb.
Identifying Dark Corners and Focal Points
Stand at the doorway of your room and look around with fresh eyes. Where do your eyes naturally wander? Where do shadows pool?
Map out your room’s main focal points, such as a fireplace, a large piece of art, or a reading nook. Your lighting should reinforce these zones rather than compete with them.
Distribute light sources at different heights across the room. A common DIY mistake is clustering all light sources at eye level or higher.
Choosing the Right Color Temperature

Warm White vs. Cool White in Living Spaces
Color temperature is measured in Kelvin ($K$), and it dictates whether your room feels inviting or like a sterile laboratory. Lower numbers mean warmer, yellower light, while higher numbers lean icy and blue.
For living rooms, bedrooms, and dining areas, stick strictly to a range between $2700K$ and $3000K$. Anything above $3500K$ introduces harsh blue hues that disrupt melatonin production and kill cozy vibes.
When I first upgraded my home office, I accidentally installed $5000K$ daylight bulbs. The space felt like an operating room until I swapped them out for warm amber LEDs.
The Dimmability Factor
No matter how great your bulb’s color temperature is, static brightness limits your design flexibility. Lighting needs change between reading at 8 PM and hosting friends at 10 PM.
Install dimmer switches on every major circuit or use smart bulbs with adjustable brightness curves. Dimmable LEDs allow you to drop the light output down to $10\%$ for movie nights without introducing flicker.
When dimming warm $2700K$ LEDs, the light naturally mimics incandescent glow, deepening the cozy atmosphere.
Distribute your illumination across low level (floor lamps, uplights behind plants), mid level (table lamps on sideboards, desk lights), and high level (pendants, wall sconces). This vertical staggering creates professional-grade visual depth instantly.
Step-by-Step Implementation Guide

Layering the Living Room
Start your living room lighting design by turning off the central ceiling light entirely. Now, place a tall arc floor lamp behind your primary sofa to act as a secondary ambient source.
Next, add a ceramic table lamp on a side table next to an armchair to provide warm task lighting for reading. Finally, mount a small battery-operated picture light above your favorite wall art.
When you turn these three non-overhead sources on together, your living room immediately feels twice as large and infinitely more luxurious.
Layering the Kitchen and Workspace
Kitchens demand rigorous multi-layering because you switch between high-intensity prep work and relaxed evening dining. Combine recessed overhead downlights for general ambient coverage with high-output under-cabinet LED strips for food prep safety.
Over the kitchen island, hang pendant lights equipped with dimmable warm bulbs. This lets you flood the island with task light during breakfast, then dim it to a soft glow during dinner parties.
Avoid relying on a single fluorescent tube or bare bulb. Kitchen surfaces reflect light aggressively, so diffused layers prevent eye fatigue.
Common Lighting Mistakes and How to Fix Them

Relying on the Overhead Ceiling Fixture Alone
The single most common mistake in home design is treating the builder-grade ceiling light as the alpha and omega of room illumination. Overhead light beats down straight from above, casting heavy shadows under eyes, noses, and furniture.
Fix this by unscrewing or permanently leaving off the central overhead bulb. Instead, bring your light sources down closer to human height using floor and table lamps.
Once you lower your eye-level light sources, harsh shadows vanish and rooms feel instantly calmer and more intimate.
Mixing Incompatible Color Temperatures
Nothing looks more disjointed than a room lit by three different color temperatures. If your floor lamp emits a warm amber $2700K$ glow while your desk lamp throws a stark $5000K$ white light, the human eye instantly notices the color clash.
Audit every bulb in your home and standardize your zones. Keep living areas at $2700K$ and task zones like home offices or workshops at $3000K$ to $3500K$.
Consistency in color temperature ties disparate furniture pieces together and establishes a cohesive aesthetic foundation.
Look for a CRI of 90 or higher. Low CRI bulbs ($80$ or below) wash out wood tones, skin colors, and fabrics, making your expensive home decor look dull and artificial. High CRI bulbs reveal true, vibrant color nuances.
Troubleshooting Tricky Room Layouts: Sloped Ceilings, Low Clearances, and Awkward Corners

Tackling Low Ceilings Without Feeling Cramped
When I renovated my first basement apartment, the low seven-foot ceilings presented an immediate challenge. Standard flush mounts barely cleared my head, and hanging fixtures were entirely out of the question. If you have low ceilings, avoid anything that hangs downward or creates heavy vertical interruptions.
Instead, lean heavily into flush-mount low-profile disk lights paired with floor uplights. Directing light upward toward a white or light-colored ceiling creates an optical illusion of height. The ceiling effectively becomes a giant softbox, bouncing a diffused ambient glow back down into the room without stealing precious vertical clearance.
Illuminating Vaulted and Sloped Ceilings Gracefully
Vaulted and angled ceilings bring wonderful architectural character to a home, but they are notoriously difficult to light evenly. Because sloping angles bounce light off at unpredictable trajectories, standard central fixtures often leave dark, shadowy dead zones in the corners of the room.
To solve this, abandon the idea of a single central light source in vaulted spaces entirely. Use directional track lighting mounted directly onto the slope, angling individual heads to wash specific zones like reading areas or gallery walls.
Combine these angled spotlights with tall floor lamps that feature downward-directed shades. This combination anchors the light at human height while accentuating the soaring vertical architecture above you.
Transforming Awkward Alcoves and Dead Corners
Every home has at least one awkward architectural alcove or dead corner that seems destined to collect dust. Trying to fit bulky furniture into these spaces usually fails, but they serve as prime real estate for creative lighting design.
Try placing a slim vertical LED corner lamp or a tension-rod shelving unit fitted with discreet under-shelf warm lighting strips inside the alcove. By lighting up these forgotten nooks, you visually push the corners outward, making the entire room feel wider, deeper, and more intentionally designed.
Advanced Lighting Techniques for High-End Aesthetic Interiors

Creating Perimeter Glow with Uplighting
Professional interior designers rarely rely solely on direct downward light. Instead, they bounce light off walls and ceilings to create a soft, enveloping perimeter glow.
Try placing small LED uplights or puck lights behind large leafy houseplants, media consoles, or heavy velvet drapes. As the light washes up the wall, it softens boundaries and makes rooms feel expansive.
This technique hides the light source entirely while letting the warm illumination take center stage.
- Embrace Three Lighting Layers: Combine ambient, task, and accent light sources to eliminate dark corners and create depth.
- Vary Your Heights: Never cluster all lamps at eye level; stagger sources across floor, table, and ceiling levels.
- Standardize Color Temperature: Stick to 2700K warm white bulbs across living spaces to maintain a cozy, inviting atmosphere.
- Prioritize High CRI: Choose bulbs with a CRI rating of 90 or higher to ensure your home’s colors look vibrant and natural.
Balancing Lumens Across Open-Concept Spaces
Open-concept living areas present unique challenges because light bleeds between the kitchen, dining room, and living room. If your kitchen is blazing bright while your living room is dim, the transition feels jarring.
Calculate total lumens per square foot to maintain balance across open zones. Living spaces generally require roughly 10 to 20 lumens per square foot, while kitchens need 30 to 40 lumens per square foot for safe prep work.
Use smart automated lighting scenes to sync brightness levels smoothly across interconnected rooms at sunset.
Integrating Smart Lighting Systems for Ultimate Control
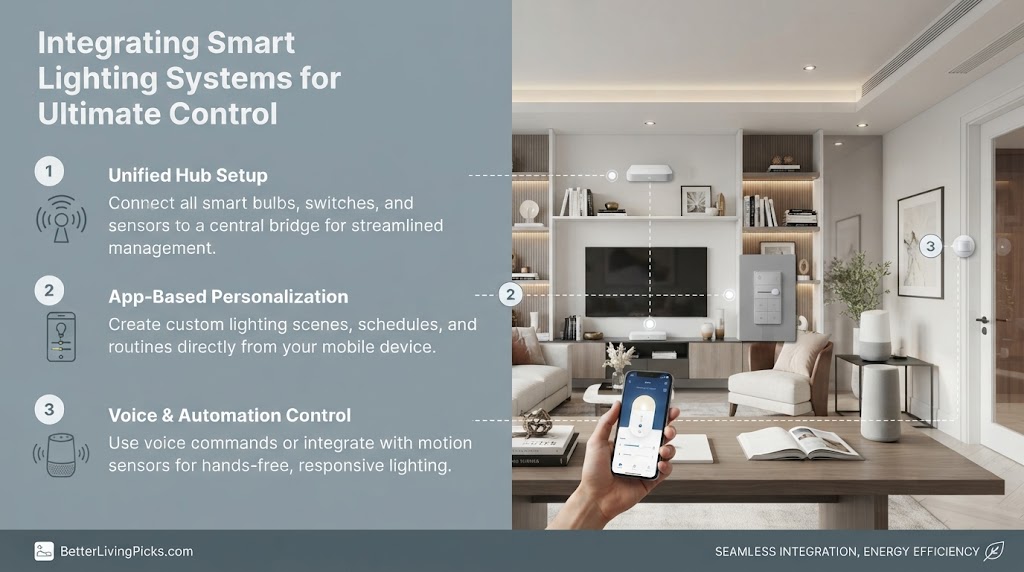
Moving Beyond Simple On-Off Switches
When I first upgraded my home lighting, I relied entirely on standard flip switches and wall dials. While they get the job done, they lock you into a rigid, static environment that requires manual adjustment every single time you change activities.
Integrating a smart lighting ecosystem completely changes how you interact with your home. Instead of walking around adjusting five different lamps, you can control entire zones, brightness curves, and color gradients with a single voice command or a tap on your phone.
Smart protocols like Zigbee, Matter, and Wi-Fi-enabled bulbs give you granular control over individual layers without tearing open your drywall to run new wires.
Setting Up Dynamic Scenes for Different Times of Day
The secret to a truly professional aesthetic lighting design is movement—not physical movement, but the subtle, organic shifting of light intensity and tone as the sun goes down.
Program your smart home bridge to execute automated routines throughout the day. For example, configure your living room lights to trigger a bright, crisp $4000K$ scene at 8:00 AM to help you wake up while working from home.
As evening approaches, program a slow, seamless transition down to a cozy $2700K$ warmth by 6:00 PM, followed by a dramatic low-glow amber scene at 9:00 PM that signals your body it is time to unwind. This automated layering mimics natural circadian daylight cycles, boosting both your mood and your interior aesthetic.
Designing Lighting Zones for Open-Concept Living and Multipurpose Rooms

Defining Functional Zones Without Physical Walls
Living in an open-concept home brings wonderful architectural flow, but it introduces a major lighting challenge. Without walls to separate spaces, your kitchen, dining area, and living room bleed into one another. If your lighting isn’t planned carefully, the entire main floor can feel like a chaotic, unstyled warehouse.
Instead of treating an open-concept floor plan as a single monolithic space, break it down into distinct functional lighting zones. Each zone should have its own dedicated lighting personality while maintaining a cohesive color temperature. For example, your kitchen island needs bright task layers, your dining table calls for a statement pendant with warm dimming, and your living room seating area requires soft, cozy floor and table lamps.
When you switch on these independent zones, they act as psychological boundaries. You instantly know where the kitchen cooking zone ends and the living room relaxation zone begins, all without building a single wall or putting up a room divider.
Managing Light Spill and Bleed Between Zones
One of the most common mistakes homeowners make in open-concept layouts is allowing high-lumen kitchen lights to spill over and ruin the mood of an adjacent living area during movie night. When light spills uncontrollably across zones, it flattens the atmosphere and destroys the intimate mood you worked hard to build.
To prevent light bleed, pay close attention to the beam angles of your recessed downlights and track fixtures. Swap out wide-flood bulbs for narrower beam angles over specific activity areas so the illumination stays exactly where you need it.
Additionally, install separate multi-gang switches or smart zone controllers for every distinct area. Being able to independently dim the kitchen down to twenty percent while keeping your reading nook comfortably glowing creates sophisticated layers of depth across the entire floor plan.
Balancing Natural Daylight Shifts in Multi-Exposure Rooms
Open-concept spaces often feature windows facing multiple directions, meaning natural sunlight floods different parts of your home at different times of day. A corner that feels dark and dreary at breakfast might experience blinding glare by mid-afternoon.
To combat these shifting natural light dynamics, pair your lighting control system with ambient light sensors or automated schedules. Program your fixtures to subtly compensate as the sun moves across your home. When afternoon shadows lengthen on the east side of the house, your smart ambient layers should automatically ramp up to maintain a balanced, harmonious glow across the entire open living space.
Renter-Friendly Lighting Hacks That Look Custom
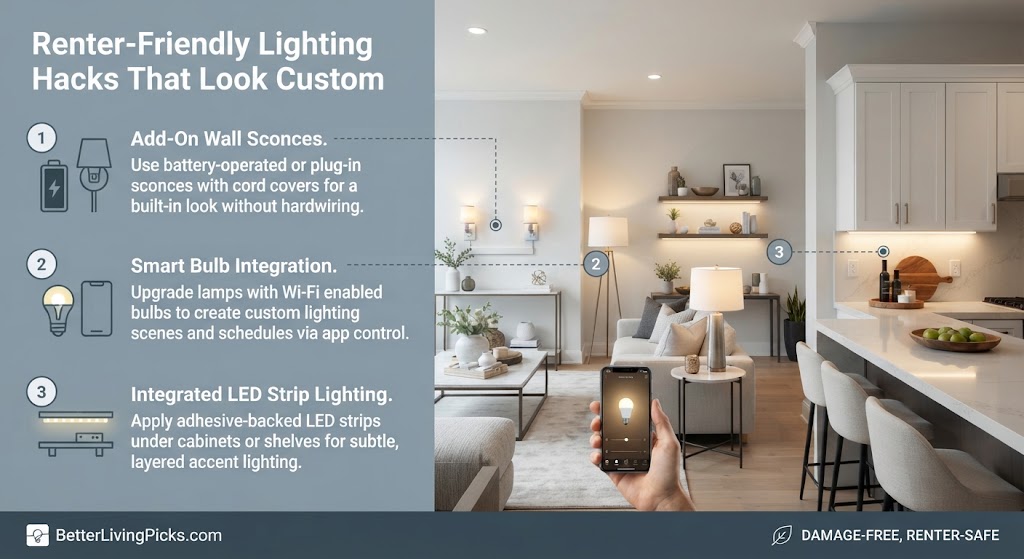
Utilizing Plug-In Wall Sconces Without Hardwiring
Renters often assume they are stuck with whatever builder-grade ceiling fixtures came with the apartment. That is a myth.
Plug-in wall sconces feature decorative cords that drape neatly down the wall, plugging into standard baseboard outlets. Many models even come with battery-operated puck lights if you lack an outlet nearby.
Mounting a pair of plug-in sconces above your bed or living room sofa instantly gives your rental a custom, high-end architectural finish.
Program your smart bulbs to start at 4000K energetic white in the morning, shift to neutral white at noon, and automatically drop down to warm 2400K amber after sunset to align with natural circadian rhythms.
Under-Cabinet Lighting with Adhesive Strips
Kitchen and bathroom counters in rental properties suffer from terrible overhead shadows. Solve this instantly using battery-powered or USB-rechargeable LED light strips with adhesive backings.
Stick them underneath upper cabinets or floating shelves to illuminate your countertops. They install in seconds and leave zero permanent damage when you move out.
Pair these strips with a remote control so you can toggle your task layers with a single touch.
Frequently Asked Questions
What is the ideal height for hanging wall sconces?
Wall sconces should generally be mounted between sixty and sixty-five inches from the floor to the center of the fixture. This places the light source right at eye level for standing adults, ensuring balanced illumination without blinding glare.
How many lumens do I need for a cozy living room?
A standard medium-sized living room requires between one thousand five hundred and three thousand total lumens distributed across multiple sources. Instead of one blinding light, spread these lumens across three or four smaller lamps and accent fixtures.
Can I mix different brands of smart bulbs in one room?
Yes, as long as they connect to a unifying platform like Apple Home, Google Home, or Amazon Alexa. Grouping them into rooms allows you to control color temperature and dimming levels simultaneously across different manufacturers.
Why do my LED bulbs flicker when I use a dimmer?
Flicker occurs when standard LED bulbs are paired with older incandescent dimmer switches that rely on high minimum loads. Upgrade to LED-compatible trailing-edge dimmers to ensure smooth, stable dimming down to zero percent.
How do I light a dark corner with no nearby wall outlet?
Use battery-operated wall sconces equipped with rechargeable LED bulbs or magnetic puck lights. Alternatively, run a slim floor-standing uplight behind a tall piece of furniture to bounce light outward without messy cords.
What is task lighting and where should I use it?
Task lighting provides concentrated illumination for specific activities like reading, cooking, or grooming. Use desk lamps in offices, under-cabinet strips in kitchens, and adjustable reading lights beside armchairs.
How does color temperature affect sleep quality?
Cool blue light above four thousand Kelvin inhibits melatonin production and signals your brain to stay awake. Switching to warm twenty-seven hundred Kelvin lighting after sunset helps your body relax and prepares you for restful sleep.
What does CRI stand for and why is it important?
CRI stands for Color Rendering Index, measuring how accurately a light source reveals true colors compared to natural sunlight. Bulbs with a CRI of ninety or higher ensure that fabrics, skin tones, and wood finishes look rich and realistic.
Are Edison bulbs good for ambient lighting?
Edison bulbs feature exposed filaments that look stunning as decorative accent pieces, but they typically have low lumen outputs and poor CRI. Use them primarily for mood lighting rather than primary task or ambient sources.
How can I make small rooms look larger with lighting?
Bounce light off walls and ceilings using uplighting and perimeter washes. Eliminating dark corners visually expands the boundaries of the room, making cramped spaces feel open, airy, and luxurious.
What is the best way to light dark artwork?
Install a dedicated battery-operated picture light directly above the frame with a narrow beam angle. Adjust the beam so it illuminates the canvas evenly without casting distracting glare on glass covers.
How do I layer lighting in a room with vaulted ceilings?
Combine low floor lamps and table lamps to anchor the human level of the room. Use uplights directed up into the vault to accentuate architectural height while keeping the lower living space feeling warm and intimate.
Final Thought
Mastering aesthetic lighting design is one of the most rewarding home DIY projects you can tackle. By ditching single-source overhead glare and thoughtfully combining ambient, task, and accent layers, you unlock the true potential of your living space. Take your time staggering your heights, standardize your color temperatures around warm amber hues, and watch as your entire home transforms into a warm, inviting sanctuary you will love spending time in every single day.