
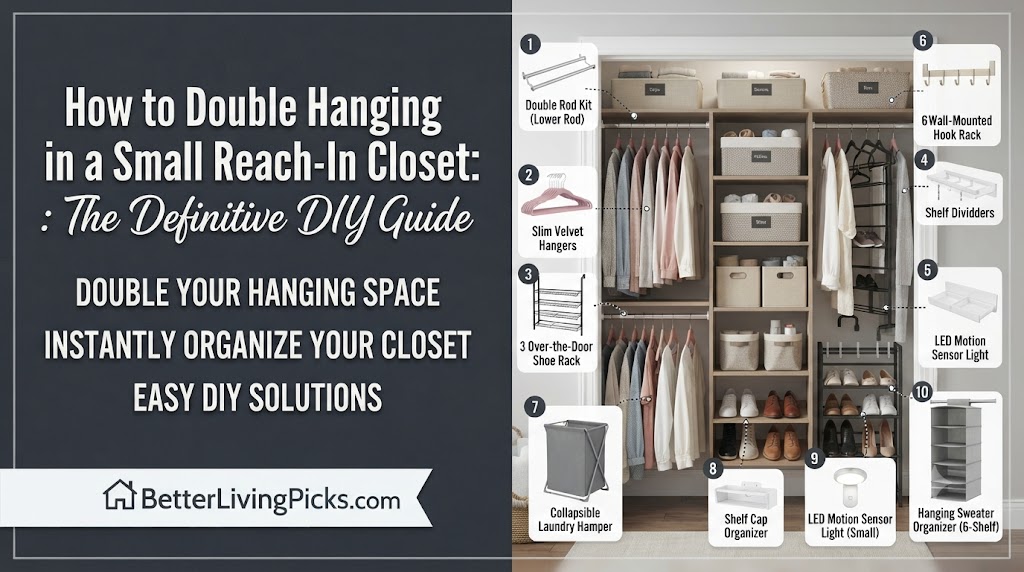
Install a second closet rod below your primary rod. This “double-hang” system creates two tiers of storage, effectively doubling your capacity for shirts, folded pants, and shorter items in the same horizontal footprint.
2. Do slim hangers really make a difference?
Yes, swapping bulky wooden or plastic hangers for slimline velvet hangers can increase your closet capacity by 30-50%. They take up far less width, allowing you to pack more garments onto a single rod.
3. How much space should be between two rods?
For a double-hang configuration, aim for at least 38 to 40 inches of vertical space between the top rod and the bottom rod. This ensures enough room for shirts or pants to hang without touching the lower rod.
4. What is the biggest mistake people make?
The most common mistake is ignoring load-bearing limits. Always anchor your new rods or shelving brackets into wall studs or use heavy-duty toggle bolts to prevent the unit from pulling away from the drywall over time.
We have all been there. You open your reach-in closet door, and a wall of clothes greets you, mashed together so tightly that the fabric wrinkles before you even wear it. It feels like you are constantly fighting for an extra inch of rod space just to find a shirt, let alone fit anything new into your wardrobe. The visual clutter alone is enough to ruin your morning mood before you’ve even had a cup of coffee.
Most standard reach-in closets are designed with a single, high rod and one long shelf, which is a massive waste of vertical potential. When builders design these closets, they prioritize the bare minimum, leaving massive gaps of unused air between your hanging clothes and the closet floor. By making a few targeted changes to your hardware, decluttering your inventory, and rethinking how you organize, you can realistically turn that single, cramped rod into two functional, high-capacity levels. Here is how to reclaim your space without needing an expensive custom closet remodel.
Assessing Your Closet’s Real Potential
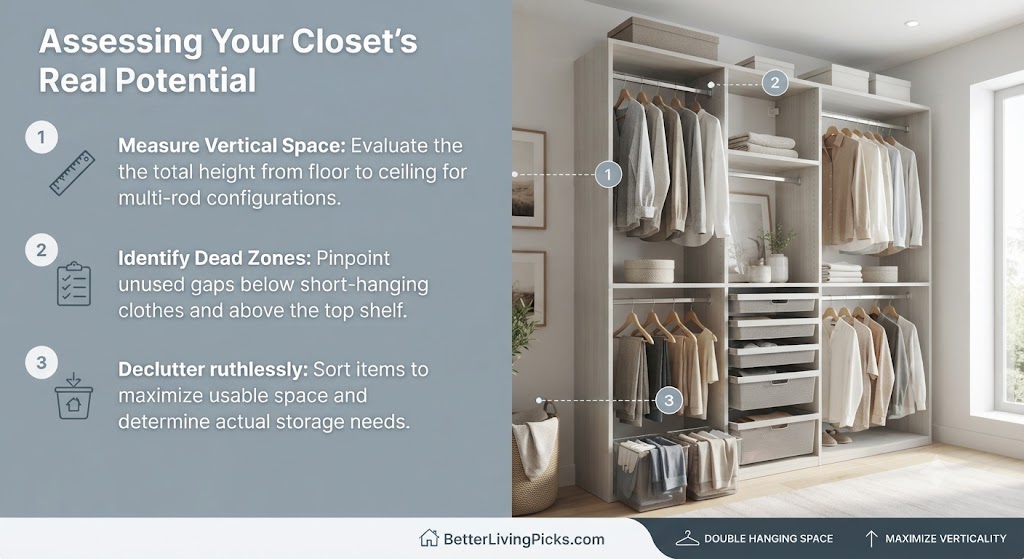
Before you buy a single bracket, take everything out of the closet. You cannot see what you are working with when the space is full of clothes you haven’t worn in three years. Emptying the space gives you a clean slate to visualize the layout.
Identifying Dead Space Above and Below
Look at the area under your current clothes. If your shirts are only halfway to the floor, you have “wasted” vertical air. This is prime real estate for a second rod. Many people don’t realize that standard clothing lengths, especially for folded tops or children’s clothes, rarely require the full five to six feet of vertical space usually provided in a reach-in closet.
Also, check the top shelf. Often, there is a large gap between the top shelf and the ceiling. If you are only using that shelf for a single stack of sweaters, you are missing out on storage for off-season items in bins. That ceiling-level space is perfect for things you rarely need, like holiday decor, spare bedding, or seasonal footwear.
Clearing the Clutter Before You Build
The best organization hack is getting rid of things. If you have five versions of the same black t-shirt, be honest about which ones you actually wear. If it is stained, ripped, or doesn’t fit, it shouldn’t be taking up valuable real estate in your primary closet.
Don’t use your closet as long-term storage for items you don’t use. Move bulky winter coats, formal wear, or heavy sweaters that you rarely reach for into under-bed storage or a different closet. This immediately gives you the breathing room needed for the new hanging system. A closet that is 80% full is much easier to manage than one that is packed to 100% capacity.
The Core Hardware Upgrades for Extra Hanging
Standard closet rods are often just thin poles that sag over time. Replacing or supplementing these is the most effective way to double your space. You need a system that can handle the weight of your wardrobe without bowing.
Installing a Second Rod (The “Double-Hang” Method)
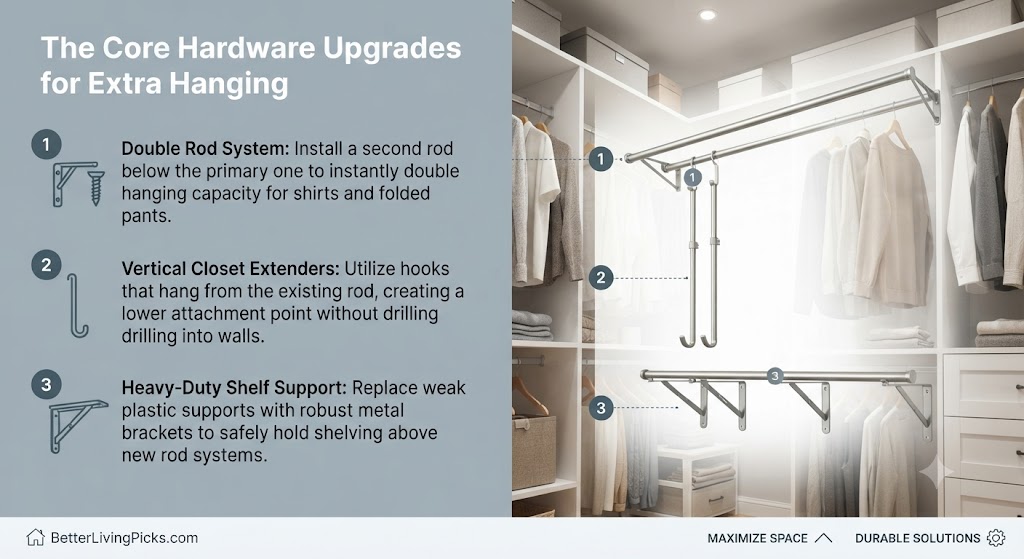
This is the gold standard for small closets. You are essentially installing an adjustable closet rod kit beneath your current one. Measure the length of your closet carefully, as you’ll need a rod that can support the weight of two tiers of clothing.
Buy an expandable tension rod or a screw-in rod kit. If you use a screw-in kit, make sure you hit the studs. If you cannot hit a stud, use high-quality toggle bolts to hold the weight. Always use a level when installing the second rod to ensure your clothes hang straight and don’t slide to one side, which can cause them to overlap and wrinkle.
Using Vertical Closet Extenders
If you don’t want to drill into the walls, look for vertical closet rod extenders. These are brilliant pieces of hardware that hook directly over your existing closet rod and hang down, providing a second rod attachment point below.
They are perfect for renters or anyone who wants a “no-tools” solution. Just keep in mind that they take up a few inches of horizontal space on your top rod, so use them sparingly. They are sturdy, but ensure you do not overload them with heavy winter coats, as all the weight is transferred to your original top rod.
Choosing the Right Shelving Support
If you are adding a shelf above the new rod, use sturdy wire or wood brackets. Never try to support a heavy shelf with just small drywall screws. Drywall is not strong enough to hold heavy loads, and a shelf collapse is a massive headache you want to avoid.
You need the weight of your clothing to be transferred to the wall framing. If you see the shelf bowing in the middle, it will eventually fail. Add an extra center bracket to distribute the weight. Use metal brackets for heavier items and space them no more than 24 inches apart to ensure maximum structural integrity.
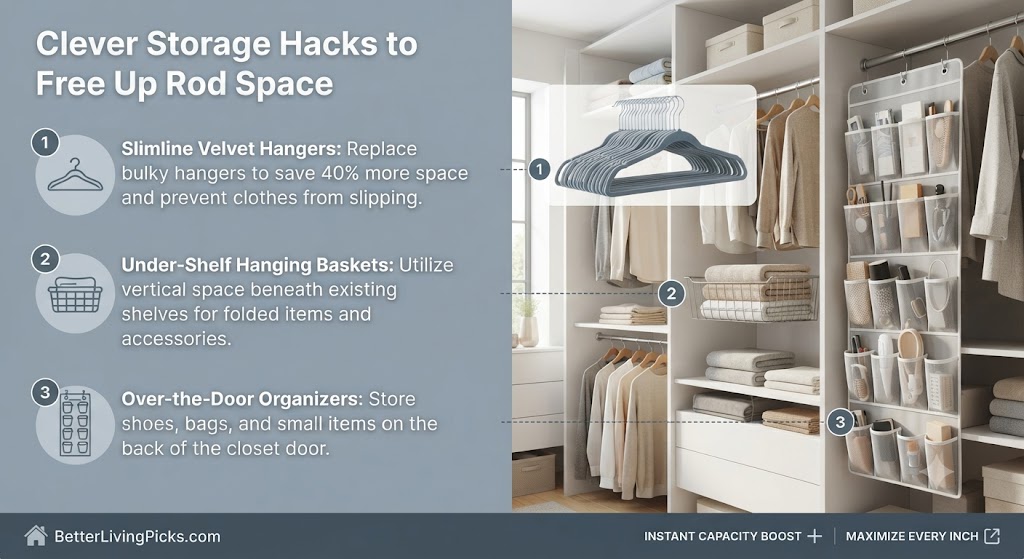
Clever Storage Hacks to Free Up Rod Space
Sometimes the problem isn’t the rod it’s the bulk of the items hanging on it. By changing how you hang items, you can save significant space without changing the physical structure of your closet.
Swapping to Slimline Velvet Hangers
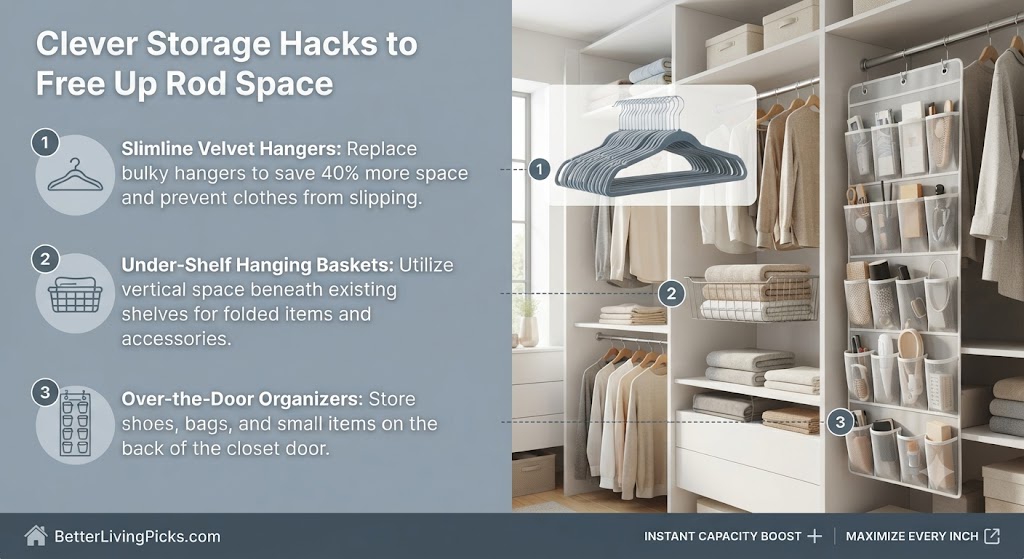
This is the easiest change you can make today. Traditional plastic hangers have wide shoulders that force your clothes to take up more horizontal space. They are bulky, awkward, and often cause clothes to slip off.
Velvet slimline hangers are thin and have a non-slip texture. Because they are so skinny, you can easily fit 10 to 15 more garments in the same space. Plus, they stop clothes from sliding off onto the floor. Switching your entire closet to matching slim hangers also creates a clean, boutique-like look that makes the closet feel much less chaotic.
Utilizing Door-Mounted Systems for Accessories
Don’t waste the back of the closet door. It is one of the most overlooked surfaces in the house. Install an over-the-door rack for items that don’t need to be on hangers.
- Use it for scarves, belts, or hats.
- Hang bags or small purses that otherwise clutter up your floor space.
- This keeps your main rod clear for items that truly need to hang.
- Consider a pocket organizer on the door for small items like jewelry, spare socks, or accessories, keeping your drawer space clear as well.
Incorporating Under-Shelf Hanging Baskets
You can buy wire baskets that slide onto your existing shelves. These act like drawers for small items like folded t-shirts, workout gear, or underwear.
This moves items off the closet floor or out of bulky plastic bins on the shelf. Everything stays organized, and you keep your floor space completely clear. This is particularly useful for things that don’t hang well, such as bulky sweaters that shouldn’t be on a hanger because they lose their shape over time.
Common Installation Mistakes to Avoid
DIY closet projects often fail because of simple oversights. Don’t fall into these traps. A little bit of planning upfront saves you from having to redo the work in six months.
Neglecting Weight Distribution
Clothes are heavy, especially when you double the amount you are hanging. If you install a rod and it immediately starts to dip, you have overloaded it or failed to anchor it properly.
Always check the weight rating on the hardware you buy. If you are hanging heavy winter coats on the bottom rod, move them toward the ends where the brackets provide the most support. Do not place all your heavy denim or coats in the center of a long rod, as this creates a stress point that will eventually lead to sagging.
Ignoring Clearance for Clothes
Measure twice, install once. You need at least 38 to 40 inches between your top and bottom rods. If you don’t measure the drop of your longest shirt or shortest jacket, you will find yourself in a bind.
If you put them too close together, your shirts will bunch up against the bottom rod. This creates wrinkles and makes it annoying to pull anything out. If your closet is too short for two full rods, consider a “half-double” design where one side has two rods and the other side stays long for dresses or coats. This hybrid approach gives you the best of both worlds.
Skipping the Stud Finder
The most common cause of closet failure is mounting hardware into hollow drywall. Drywall is designed to handle static weight, but the constant shifting of clothes on a rod creates dynamic forces that will rip screws right out.
Always use a stud finder. If your rod doesn’t align with a stud, use high-quality toggle bolts. Toggle bolts open up behind the drywall, distributing the weight over a much larger area than a standard screw or plastic anchor ever could. Take the extra five minutes to find those studs, and your setup will last for years.
Maintaining Your Organized Space
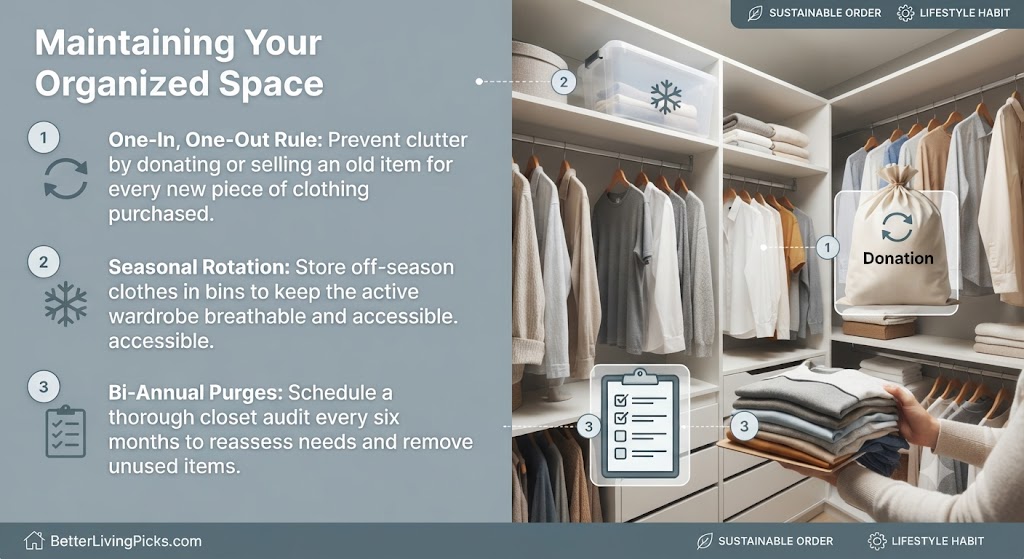
Once you’ve successfully doubled your hanging space, the goal is to keep it that way. An organized closet requires a bit of ongoing maintenance.
The One-In, One-Out Rule
To keep your new, doubled space from becoming overstuffed again, implement the “one-in, one-out” rule. Every time you buy a new piece of clothing, donate or sell an old one. This prevents your closet from slowly creeping back into a state of chaos.
Seasonal Rotation
If you have a small closet, you likely don’t have enough room for all your clothes at once. Rotate your wardrobe seasonally. When winter hits, move your light summer dresses and tanks to a storage bin under the bed and bring out the heavy sweaters and wool pants. This keeps your current closet breathable and easier to navigate.
Regular Purges
Every six months, take an hour to go through your clothes again. Our styles and lives change, and so does our wardrobe. If you haven’t touched a piece of clothing in a year, it is time for it to go. A cleaner, lighter closet is much easier to manage, and you’ll find that you actually enjoy getting dressed in the morning when you aren’t fighting through clothes you don’t even like.
Frequently Asked Questions
How do I know if my wall can support a second closet rod?
Check for wall studs using a stud finder. If you are mounting into drywall, you absolutely must use heavy-duty wall anchors or toggle bolts. Standard plastic plugs will likely pull out once the rod is loaded with heavy shirts or pants.
Can I install a second rod in a closet with wire shelving?
Yes, you can buy specific “rod-to-wire” brackets that snap onto existing wire shelving. These are often the easiest way to add a second tier of hanging space without needing to drill into the walls or move existing components.
Is it better to hang pants or shirts on the second rod?
Short-sleeve shirts and blouses are best for the second rod because they require less vertical height. Pants can be bulky, but if you fold them over a hanger, they can fit on a lower rod as long as you have accounted for the extra clearance.
What should I do if my closet is too narrow for extra shelving?
Focus on the door and the floor. Use an over-the-door organizer for accessories and look for stackable, clear bins for the closet floor. Keeping the floor clear prevents that “stuffed” feeling and makes the space look much larger.
Do I need to remove the old rod to add a second one?
Usually, no. Most double-hang systems are designed to be installed beneath the existing rod. If your original rod is placed very low, however, you might have to move it up higher to make room for the second one below it.
How can I make my small closet look more high-end?
Consistent hangers make the biggest visual impact. Using all matching velvet hangers makes the closet look organized and professional, even if it is packed full. Adding a small battery-operated LED light can also make a huge difference in visibility.
Final Thoughts
Doubling your hanging space is less about buying expensive custom cabinetry and more about using the vertical air that already exists in your closet. Start by clearing out what you don’t need, then commit to a double-rod system and slim hangers. You will be surprised at how much easier your morning routine becomes when you can actually see your clothes and pull them off the rack without a fight. Take it one step at a time, ensure your hardware is properly anchored to the wall studs, and you will have a functional, airy closet by the end of the weekend. Your future self, the one who isn’t ironing shirts every morning will thank you.

